
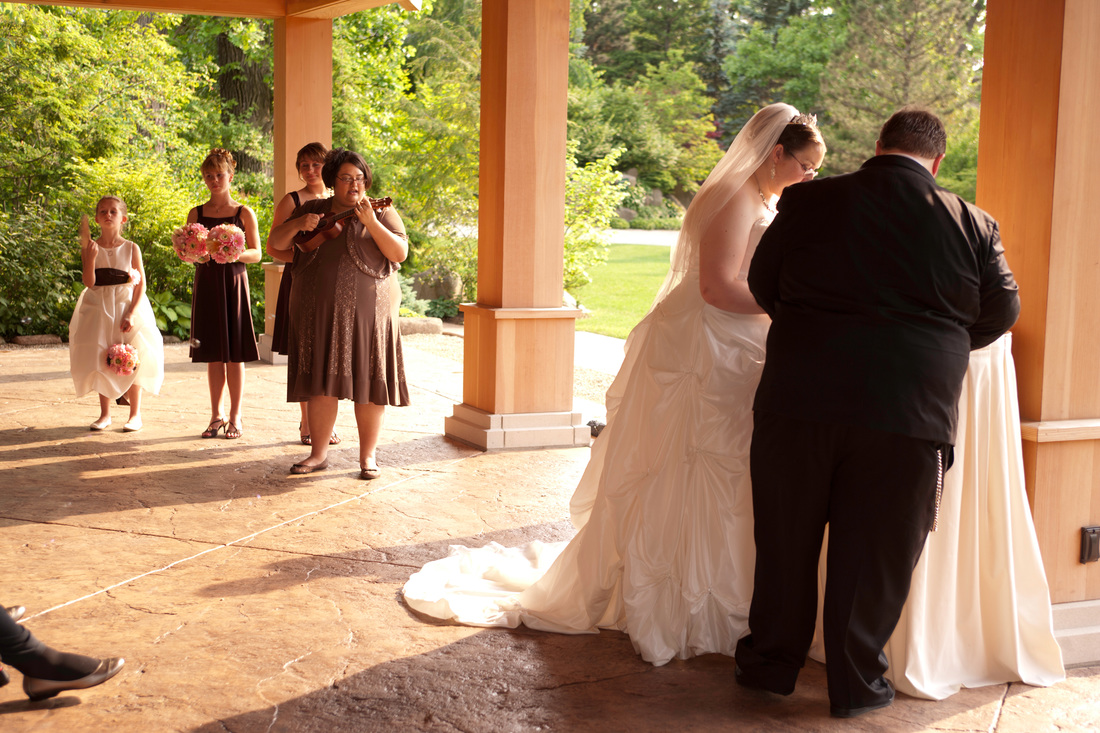
We celebrated our 4th year of marriage on May 26th! Time really does fly. I've been meaning to put all of my diy projects together in a blog but never got around to it. Well, here it is! It was a lot of work, but Rob and I enjoyed making our day more special by doing everything we could ourselves. Our theme was cherry blossoms, colors were pink, teal, and brown, and we were married at the Anderson Japanese Garden in Rockford, IL. Here are the projects in no particular order!
Save the Dates & Invites
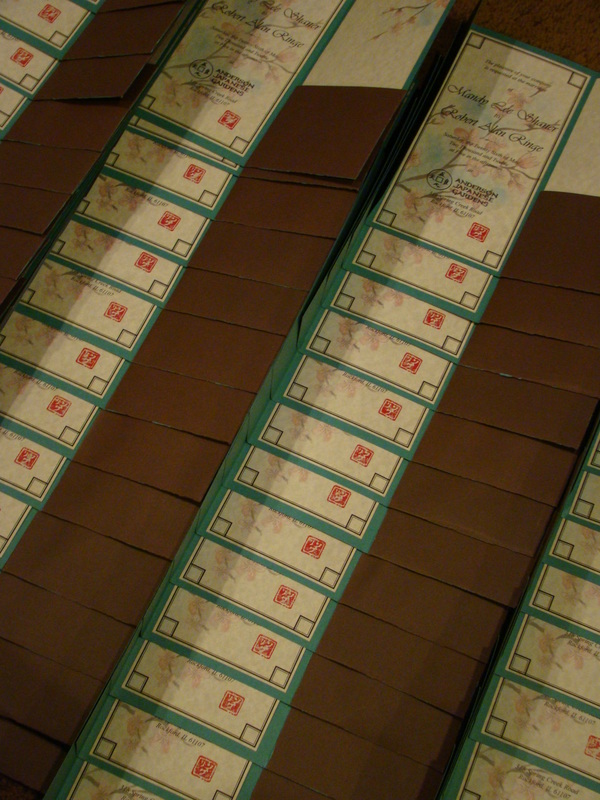
Rob designed our awesome invitations. I don't have a photo of one with the inserts and such, but they looked amazing! He even carved a traditional stone stamp (the red mark) with our last name in Japanese. The save the dates were very similar but also included our engagement photo.
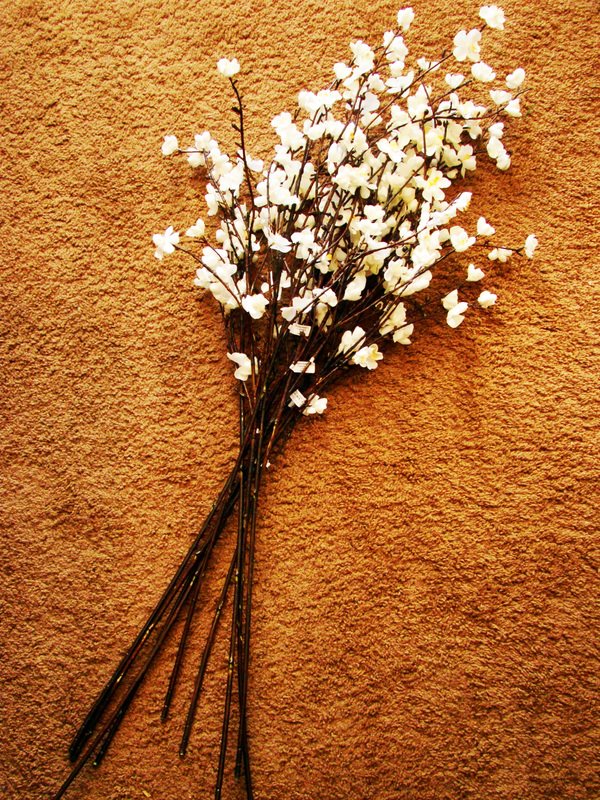
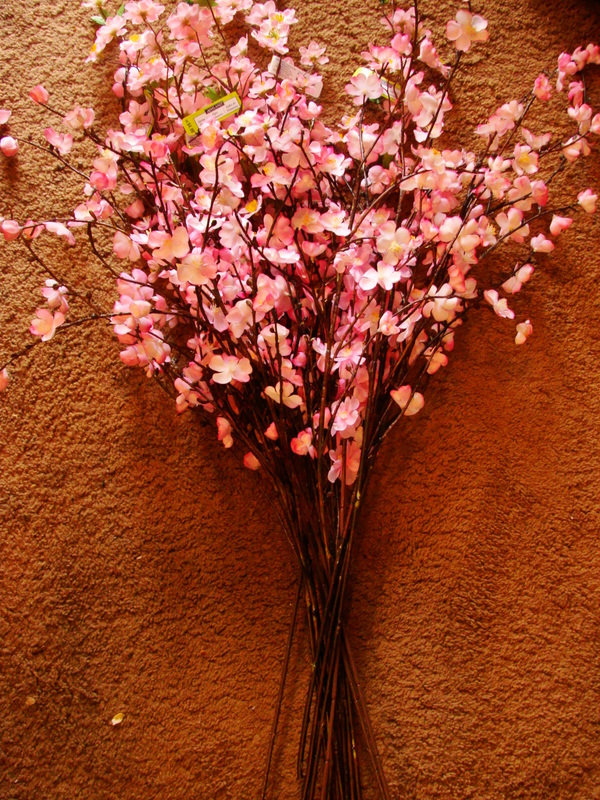
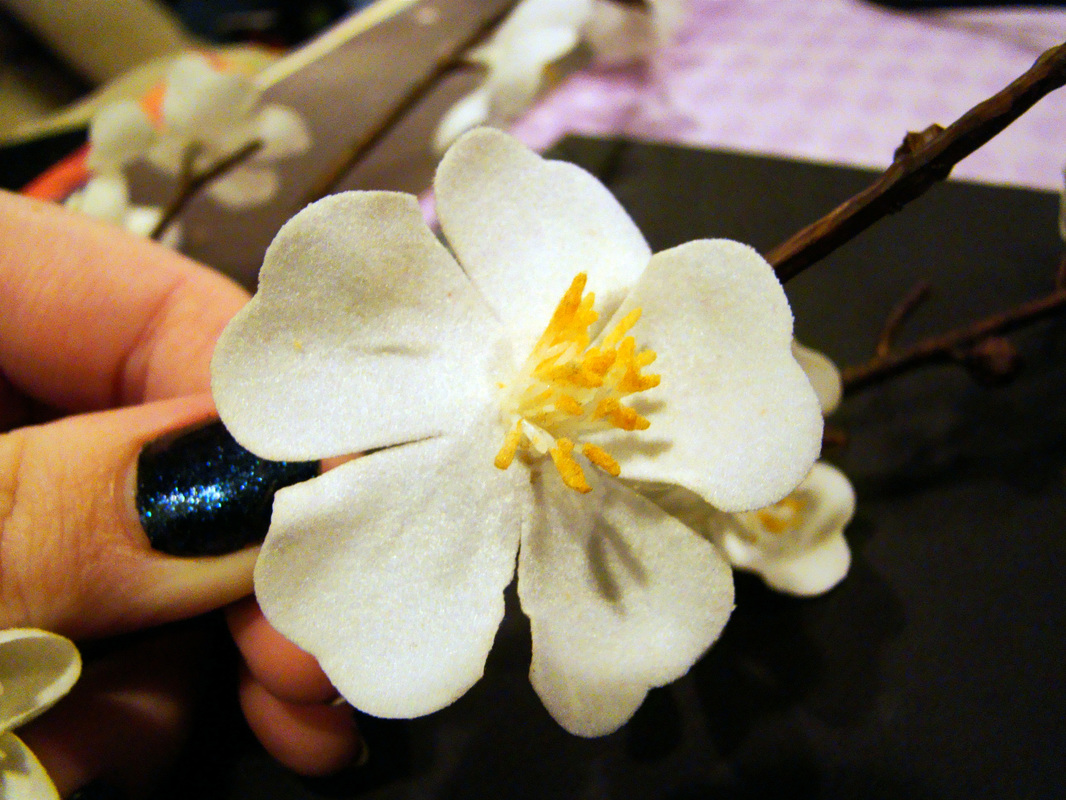
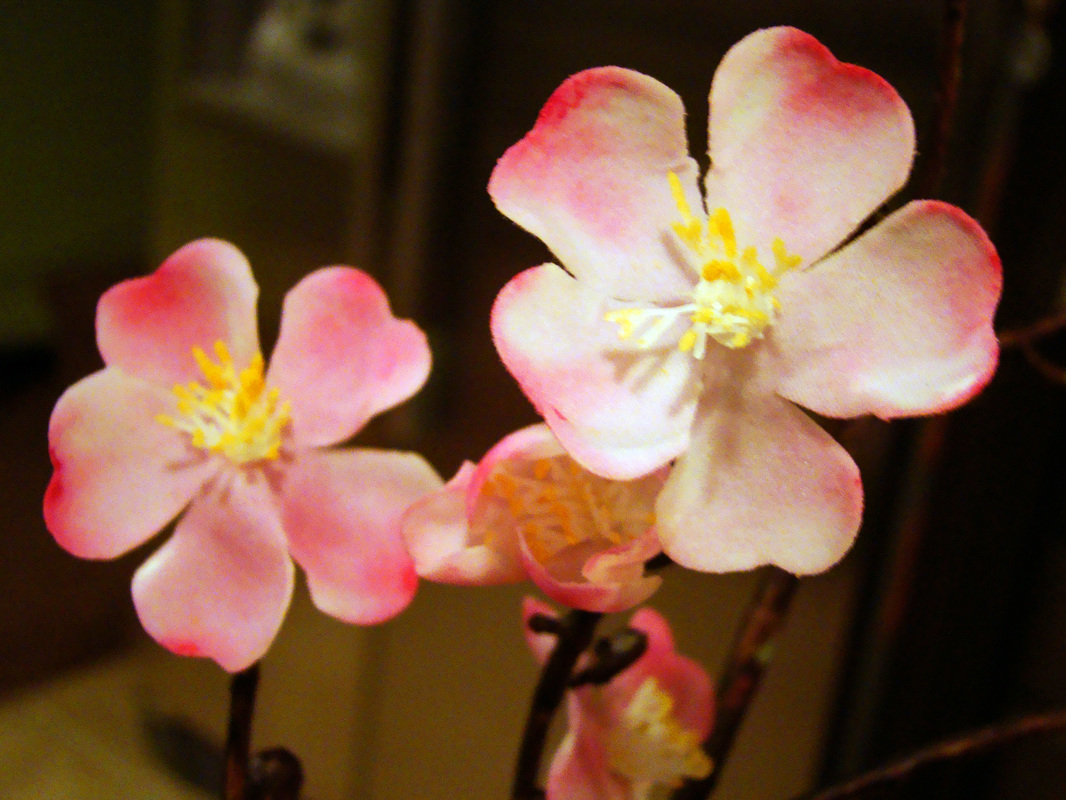
Bouquets
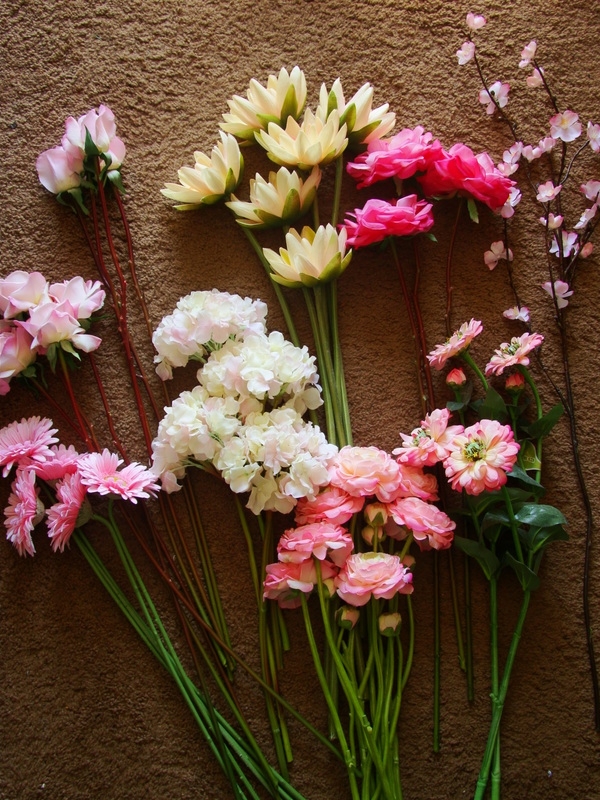 |  |
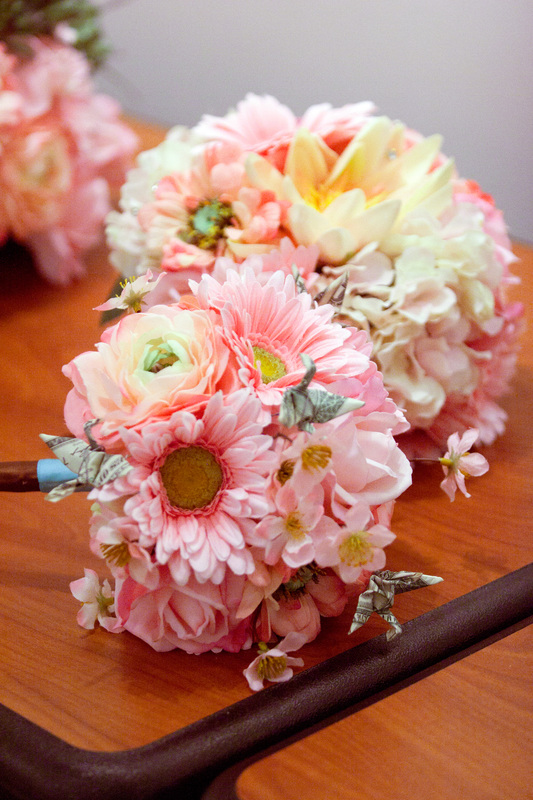
I spent a LOT of time tracking down fake flowers that looked and felt real. People were amazed when I told them they were fake :) I also sprayed them with a floral scent so that you could "smell" them.
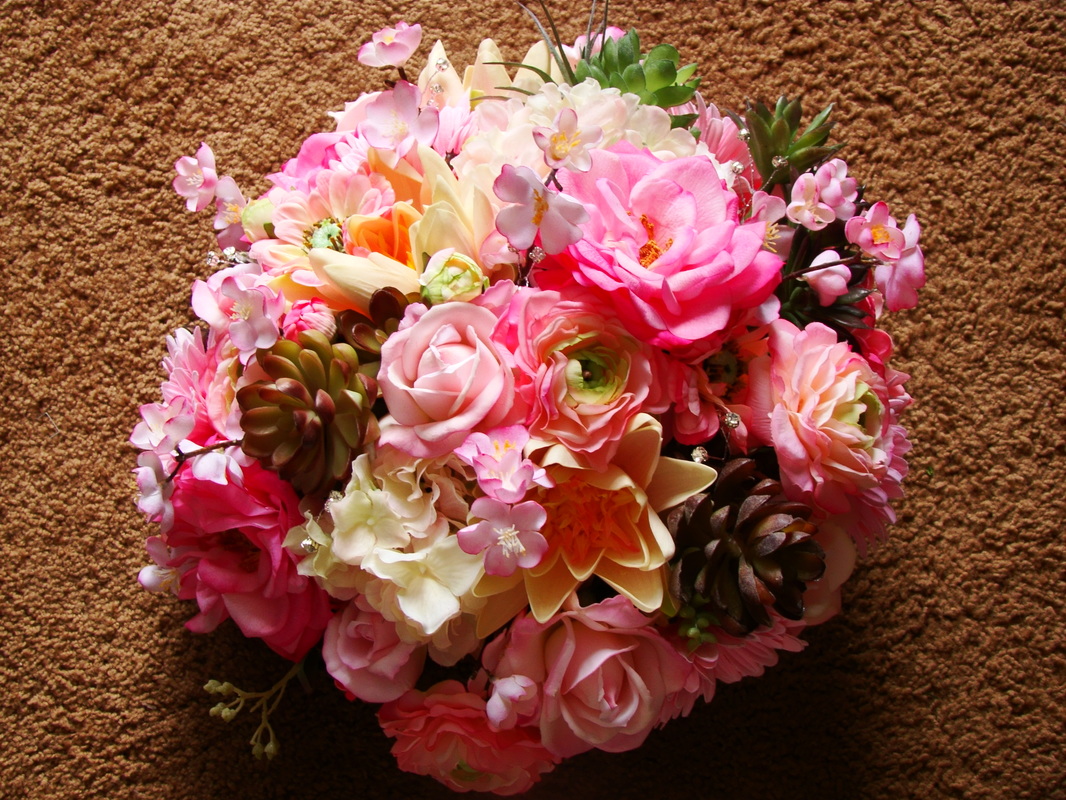
My bouquet was so heavy that it was very difficult to hold with one hand!
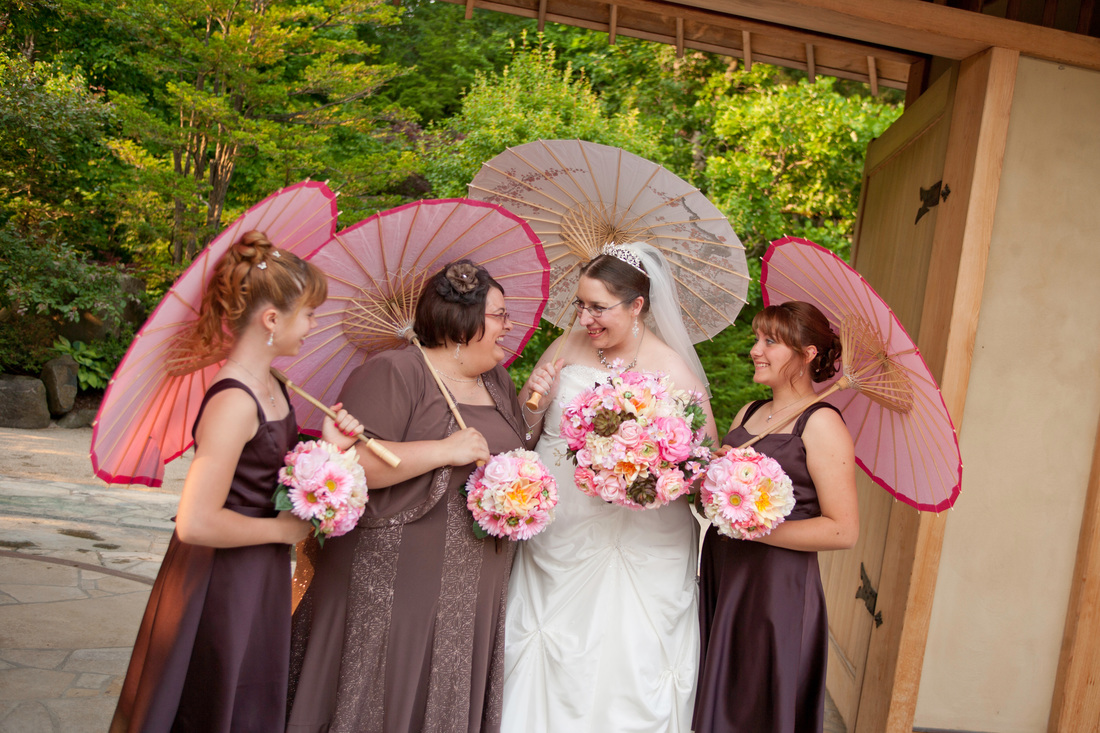
The bridesmaid's bouquets were smaller and included only flowers
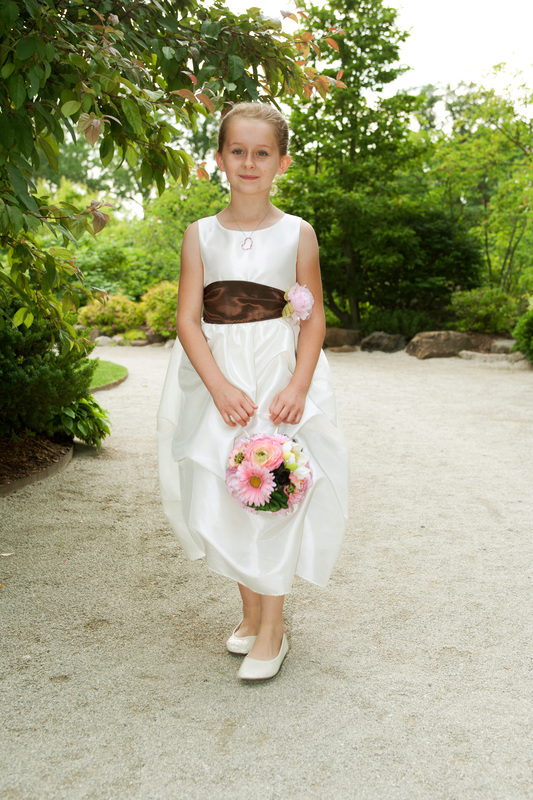 |  |
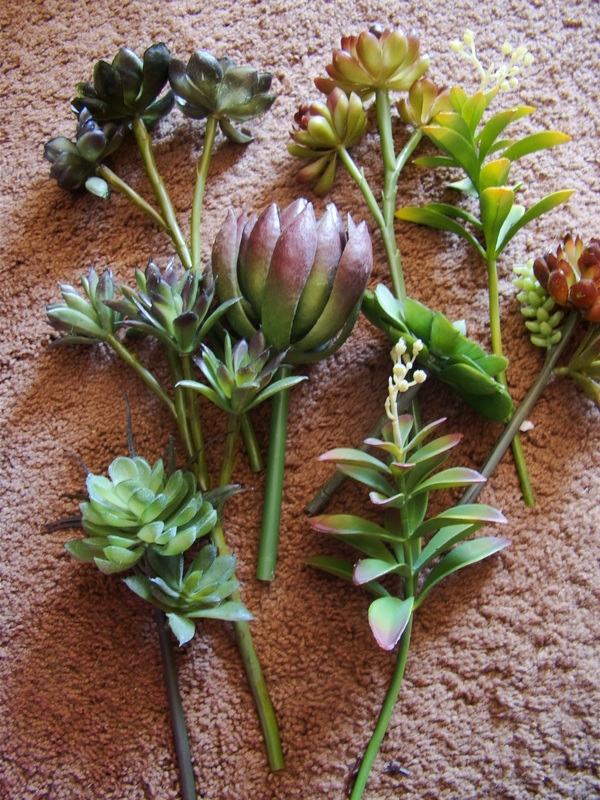
The flower girl carried a pomander that included succulents to match my bouquet
 | 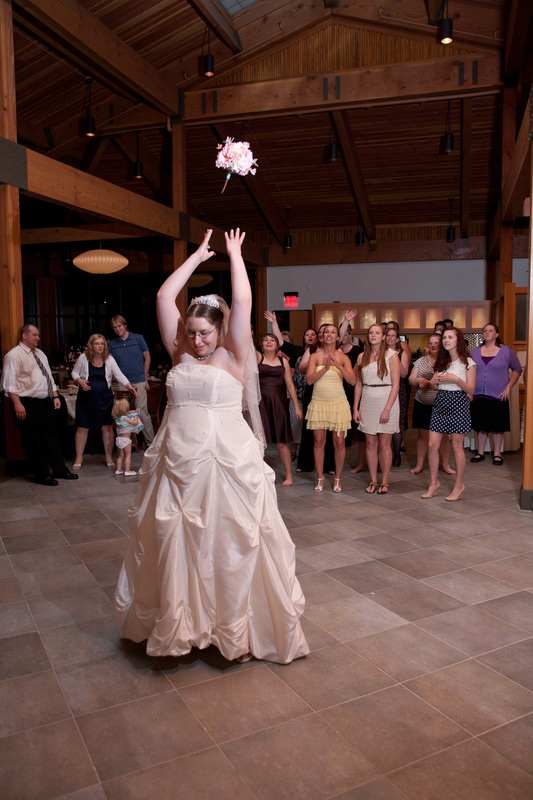 |
I also made a special bouquet to toss. I don't have a lot of single friends/family, so I decided to bring ALL the girls out on the floor for the toss. I included 5 origami cranes made using dollar bills and stuck on wires into the bouquet. I wanted the toss to be a good luck and good fortune thing, instead of the traditional "next to be married" toss.
Boutineers & Corsages
I made Rob's corsage ivory to match my dress
The rest of the guys had pink rose buds and cherry blossoms
 |  |
And corsages for our moms
Custom Swords
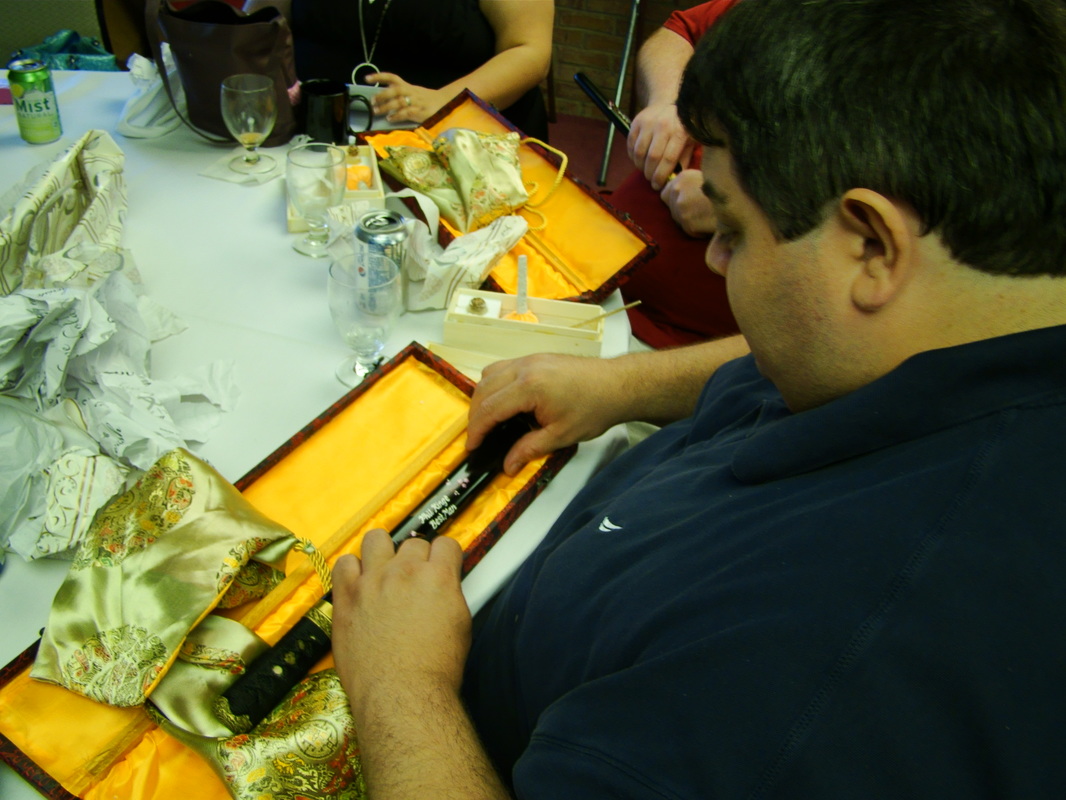
The groomsmen received custom tantos that Rob had made. I personalized them with painted cherry blossoms and their names/rolls in the wedding.
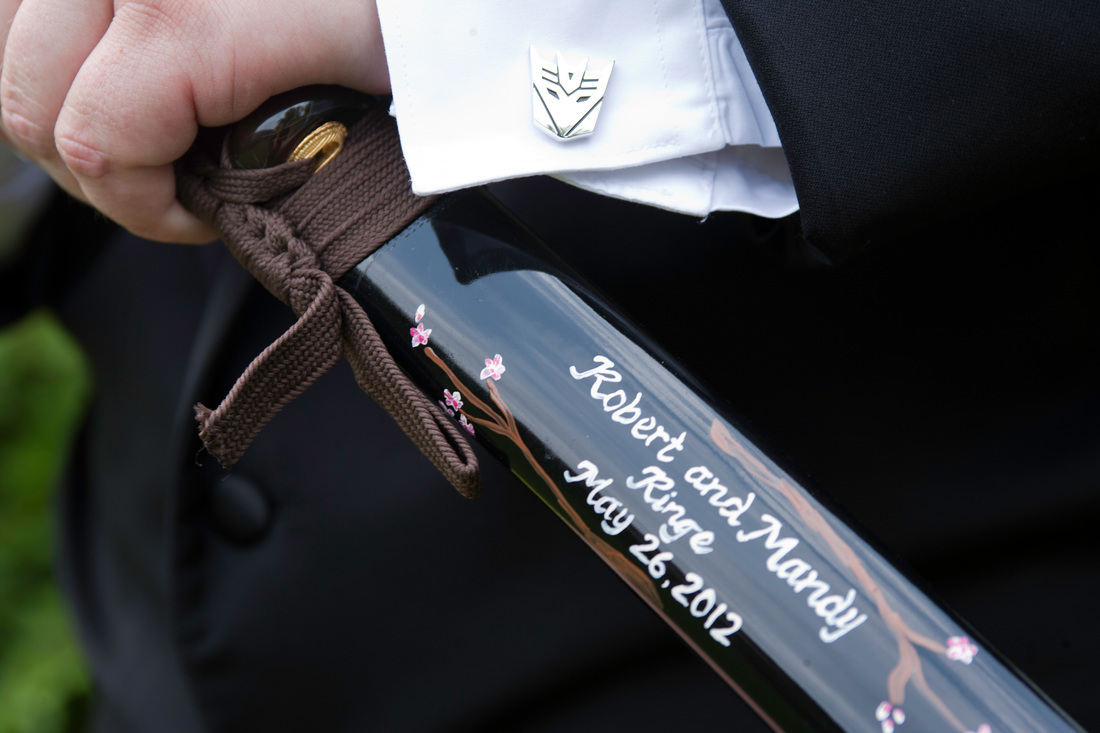
Rob had a custom katana which I also personalized
Ring Pillow & Guest Book
Got this set on sale at Michaels! It was nice because it already had our shade of brown, I just had to dress it up a bit :)
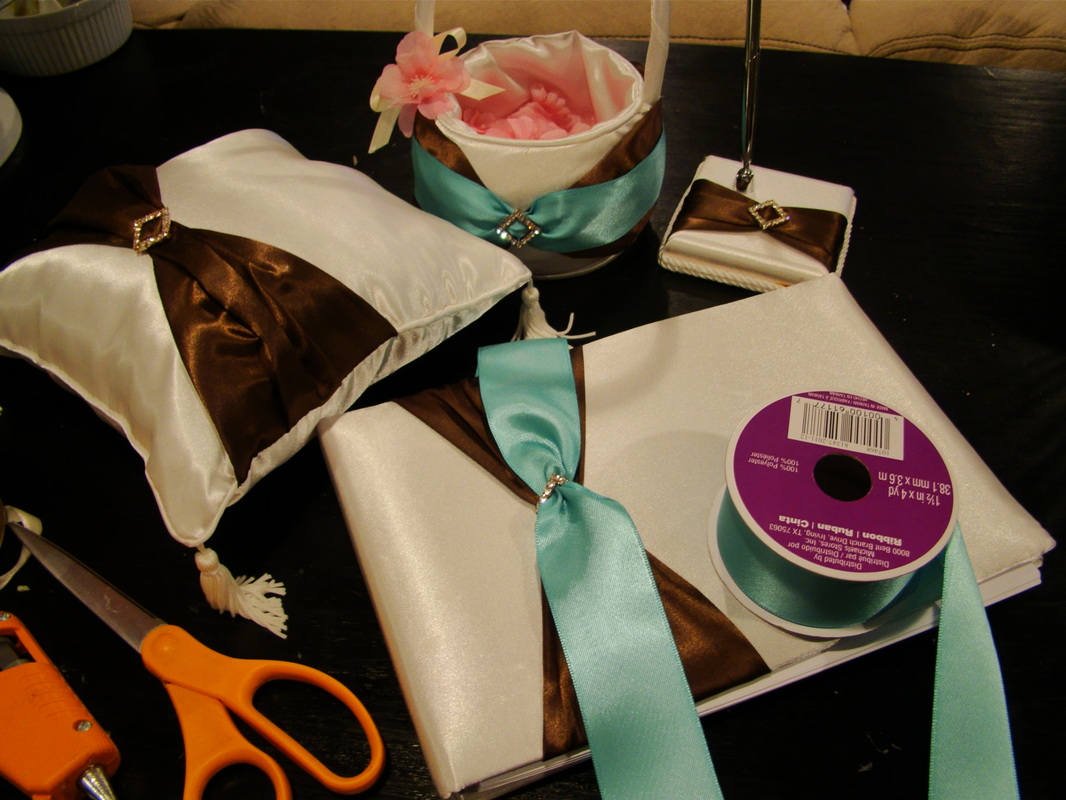
It was super easy to add the teal ribbon!
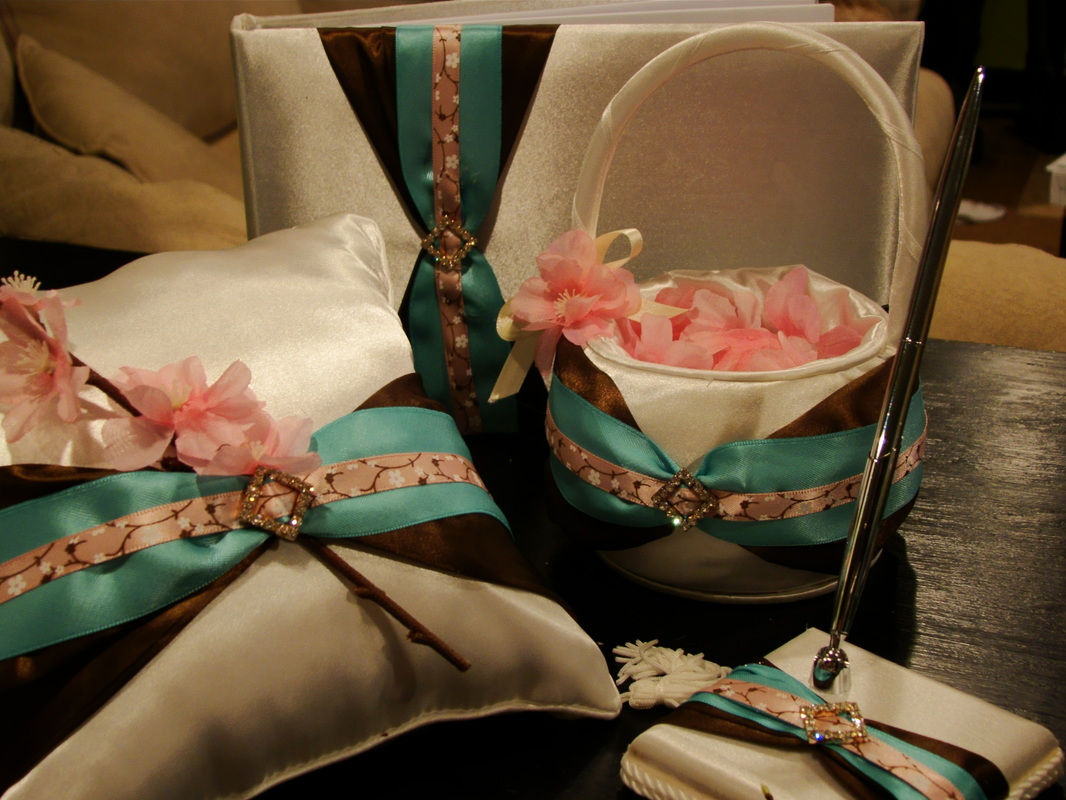
I also added cherry blossom ribbons and some fake cherry blossoms. We ended up not using the flower girl basket, but it was cute :)
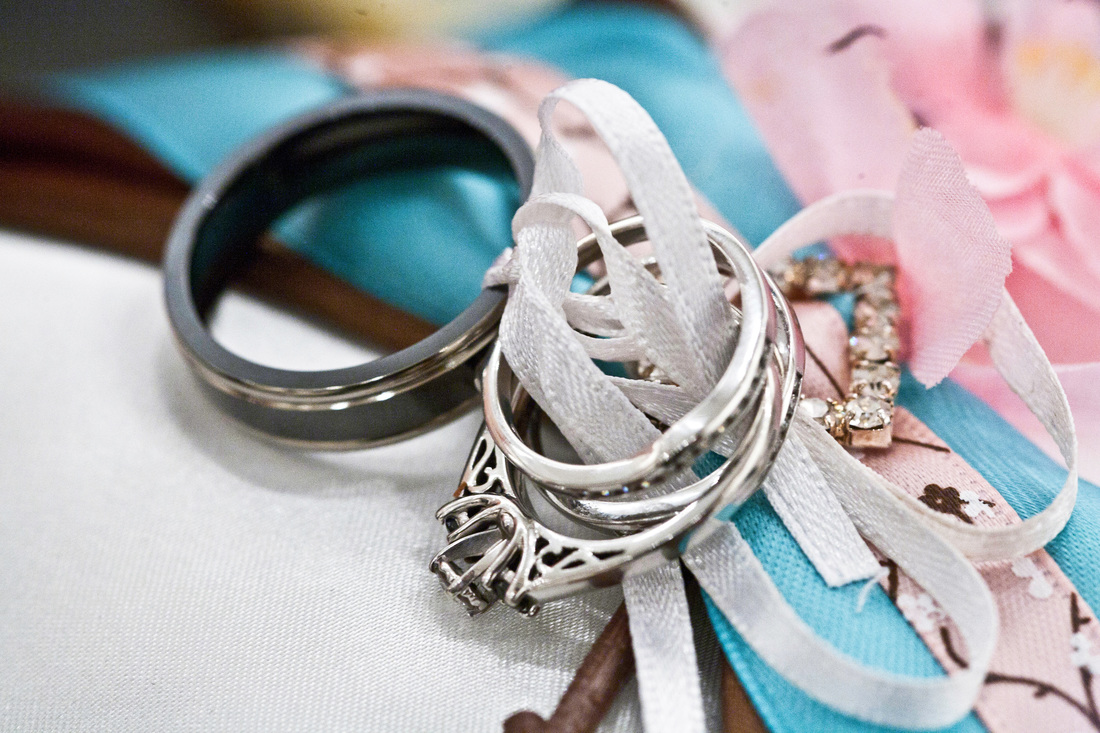
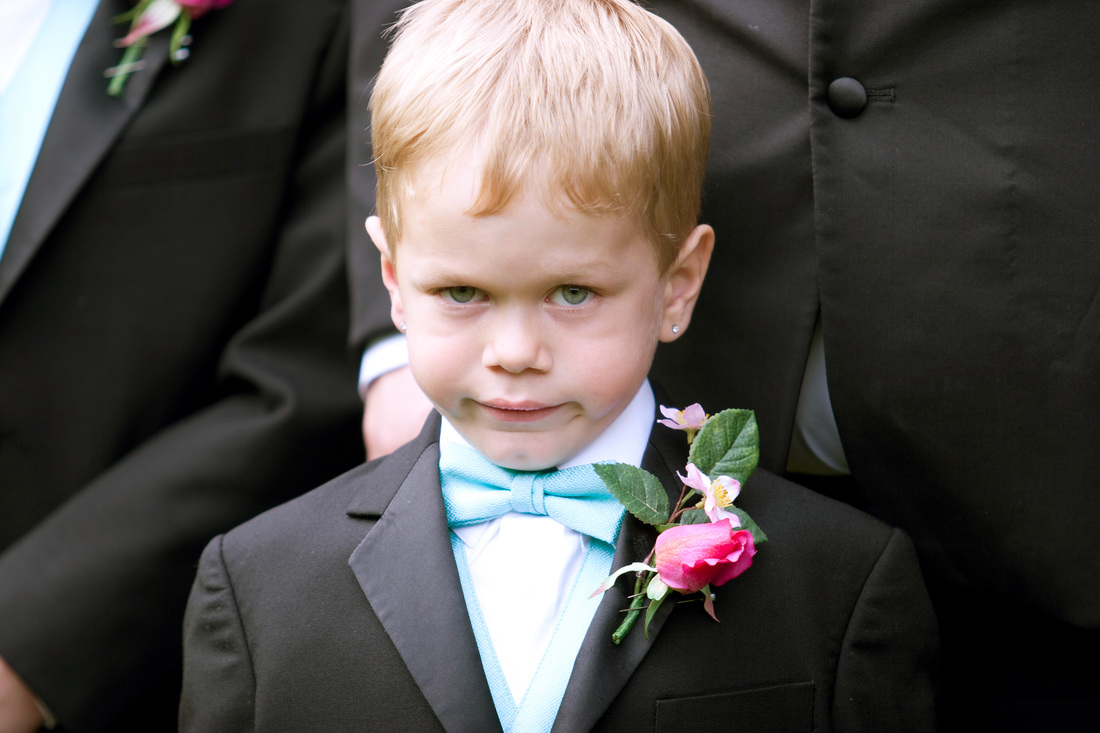
The coordinator lady at the gardens told us we shouldn't put the real rings on the pillow because my nephew might lose them. I scoffed at her because I knew he was awesome and he'd do a great job.
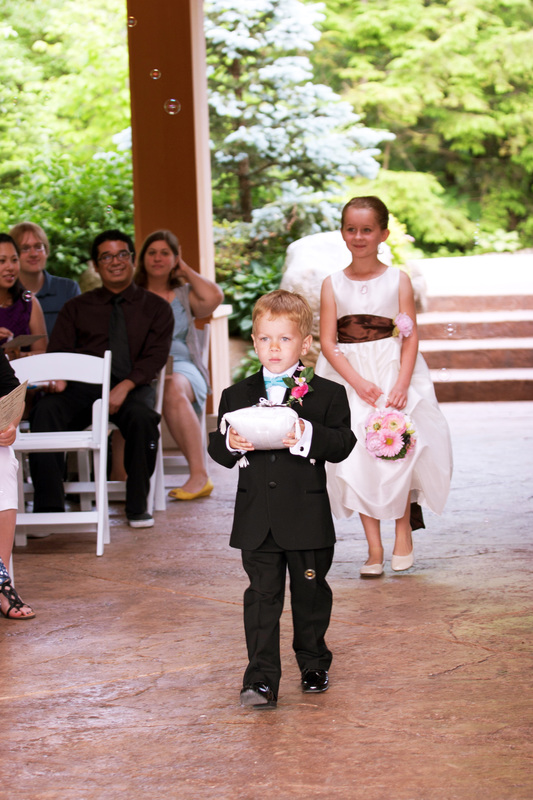
He took his job so seriously!
Centerpieces
 |  |
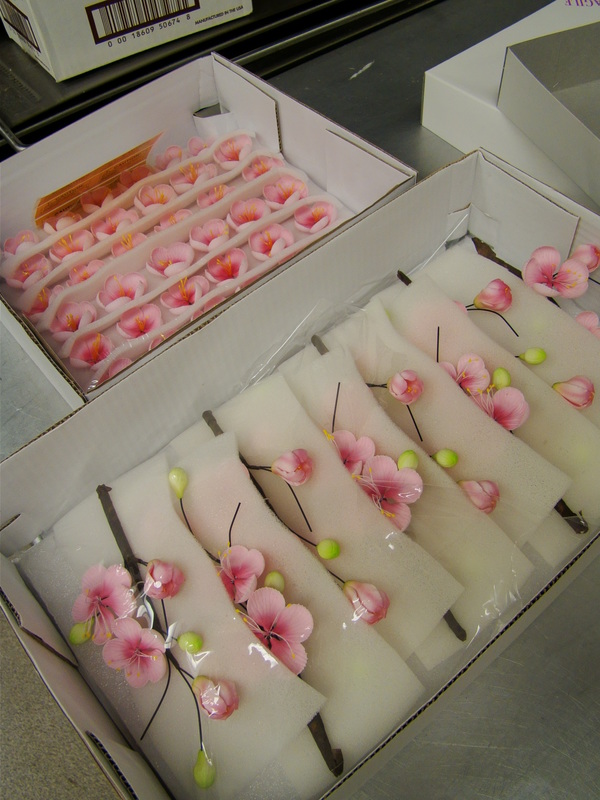
I struggled to find cherry blossoms that looked realistic enough for me. The closest ones I found were white. Not to be deterred, I hand painted each and every flower using a watered down paint technique.
The flowers weren't silk - they were a sort of stiff felt fabric
To paint them I put a little watered down pink on the end of a petal and then dropped water onto it with another brush. As the felt fabric drew the water in it pulled some paint with it and created a beautiful fading effect.
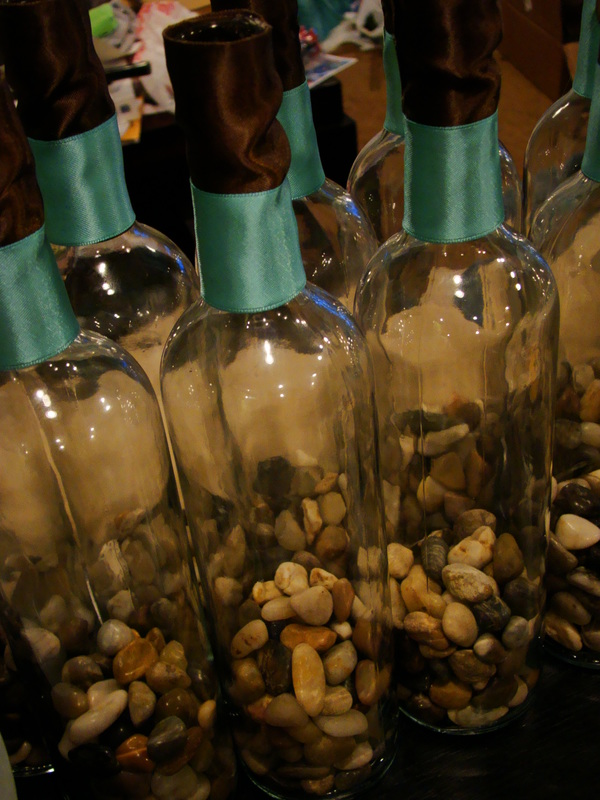 | 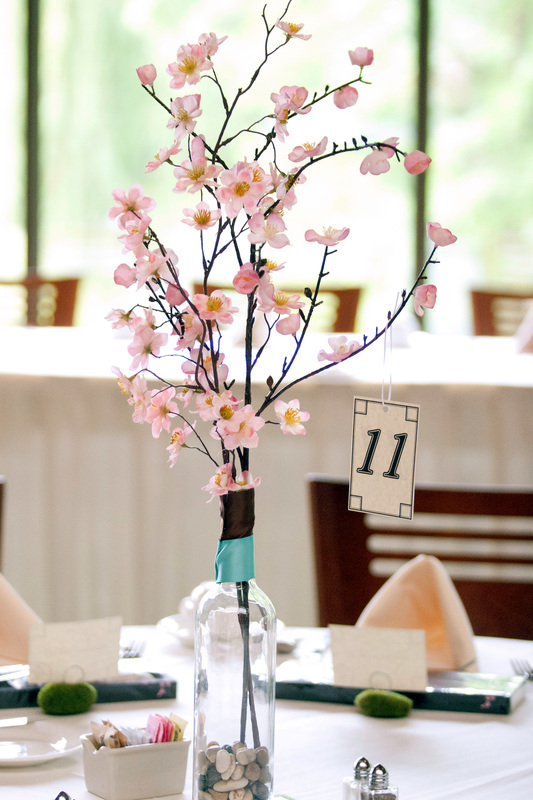 |
I wrapped bottles with brown and teal ribbon and filled them with river rocks. I also created the table numbers and hung them from the branches with ribbon.
1000 Paper Cranes
Since we were going with a sort of Japanese inspired wedding, I decided it would be fun to make a senbazuru. An ancient Japanese legend promises that anyone who folds a thousand origami cranes will be granted a wish by the Gods.
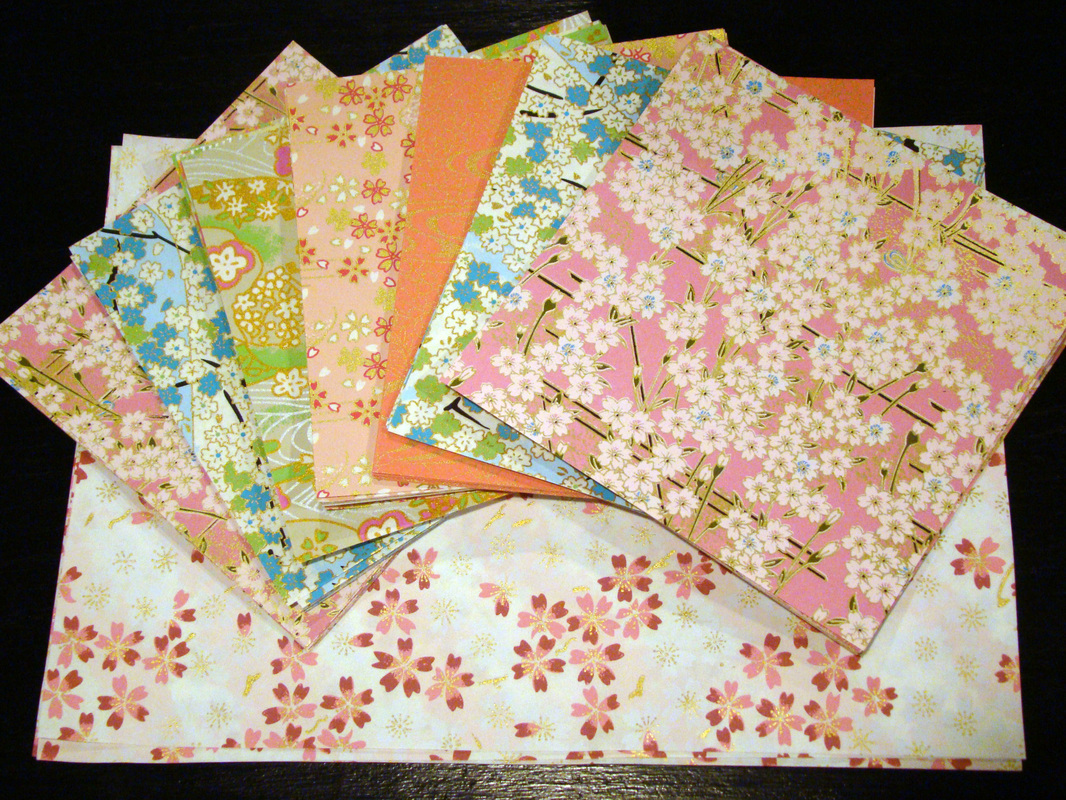
I used a combination of traditional washi paper (pictured above, so pretty!) and scrapbook paper
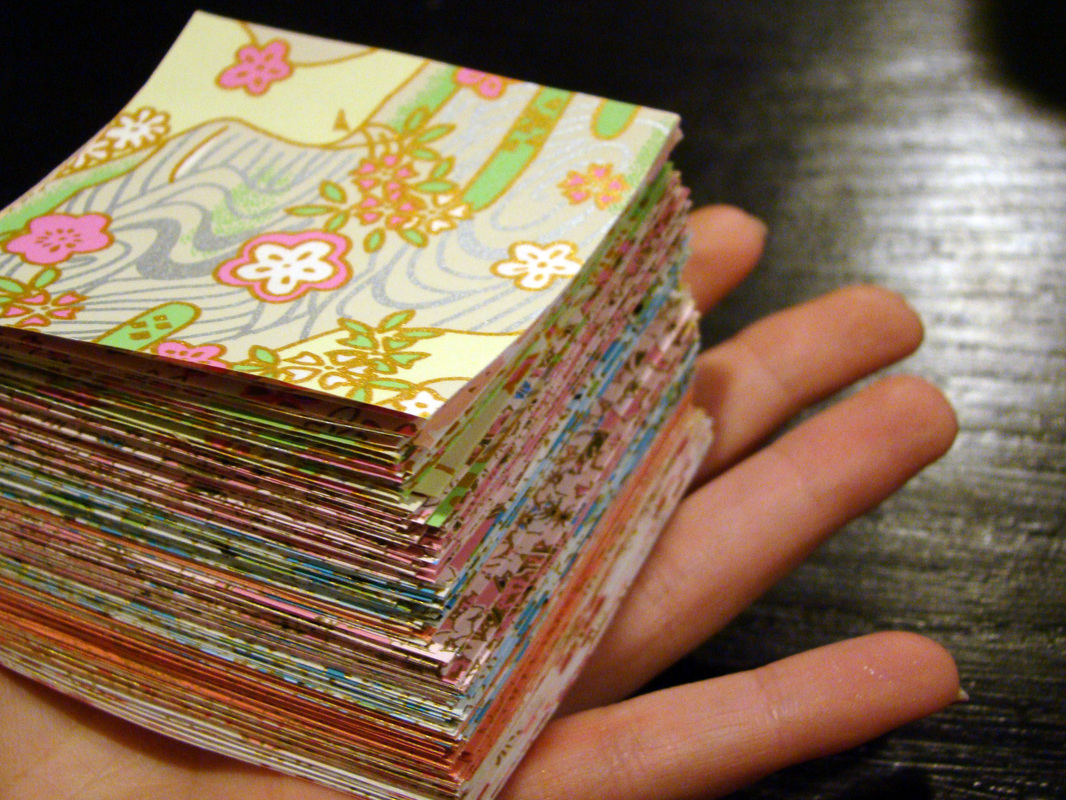
I cut all of the paper into 3x3 squares. Thankfully we have an awesome paper cutter (like the ones we used at school back in the day!)
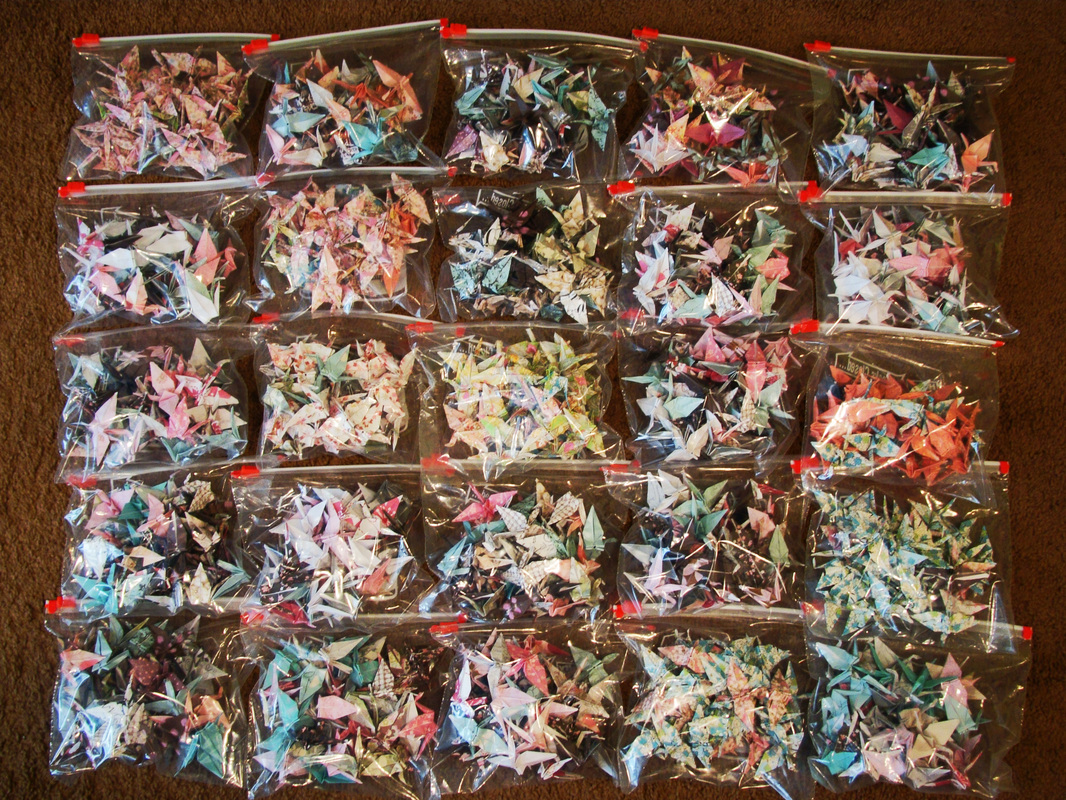
I kept all the cranes in bags of 25 as I went so that I could keep track of how many I had done

I did have a little help from Rob and a lady at work, but I folded the majority of the cranes. The thumb on my right hand still has some pain in the joint when I move it a certain way.
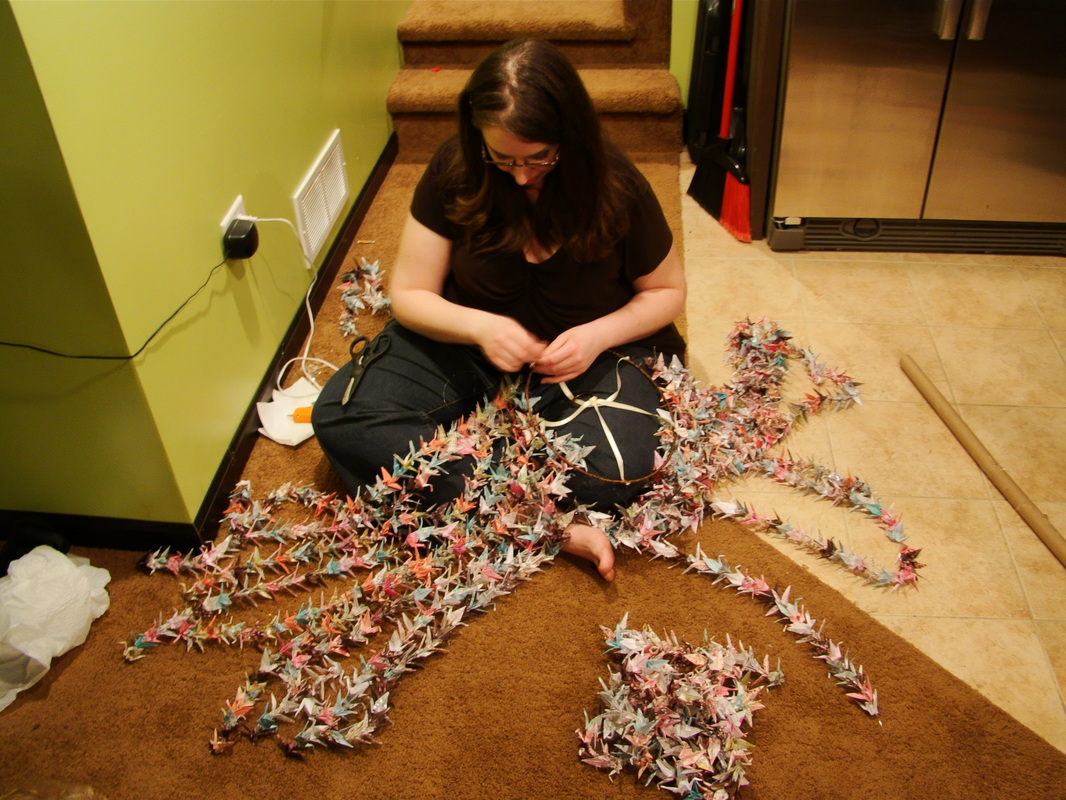
When stringing the cranes on fishing line I put a small clear bead in between each one to give them some separation (traditional senbazuru are just stacked on top of each other). 25 cranes to a string - all in our wedding colors - hung on a metal hoop that I wrapped in brown ribbon.
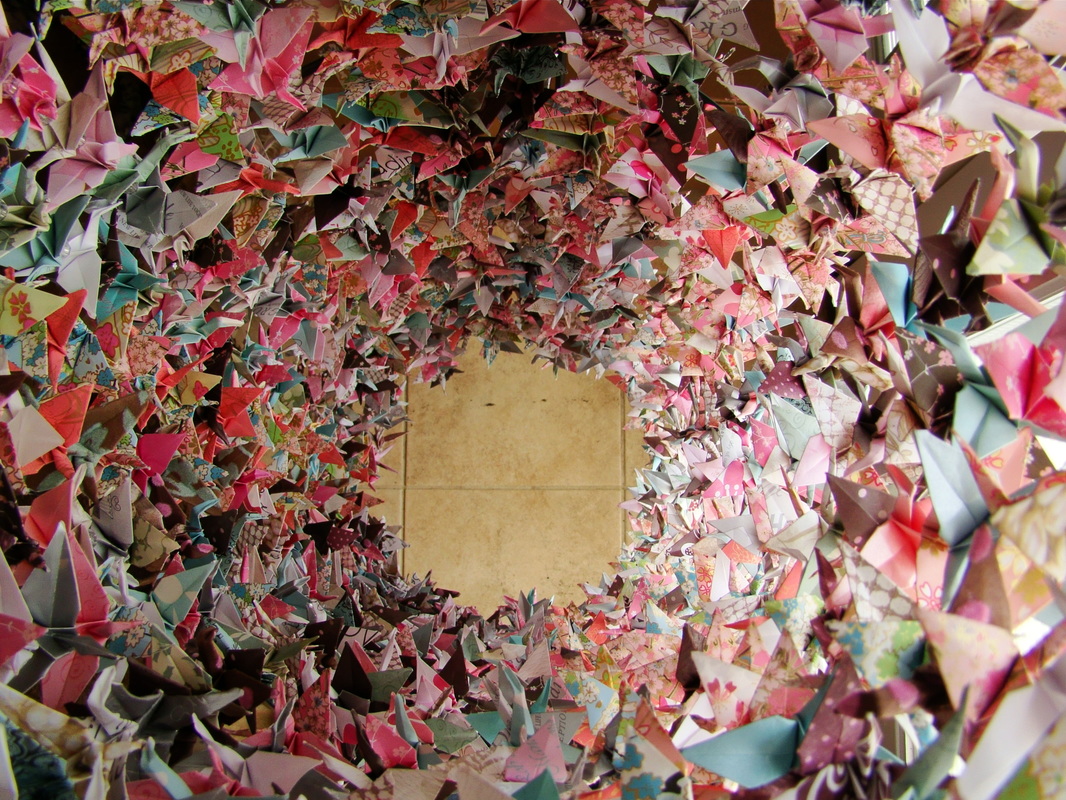
Looks pretty cool looking down the center from the top :)
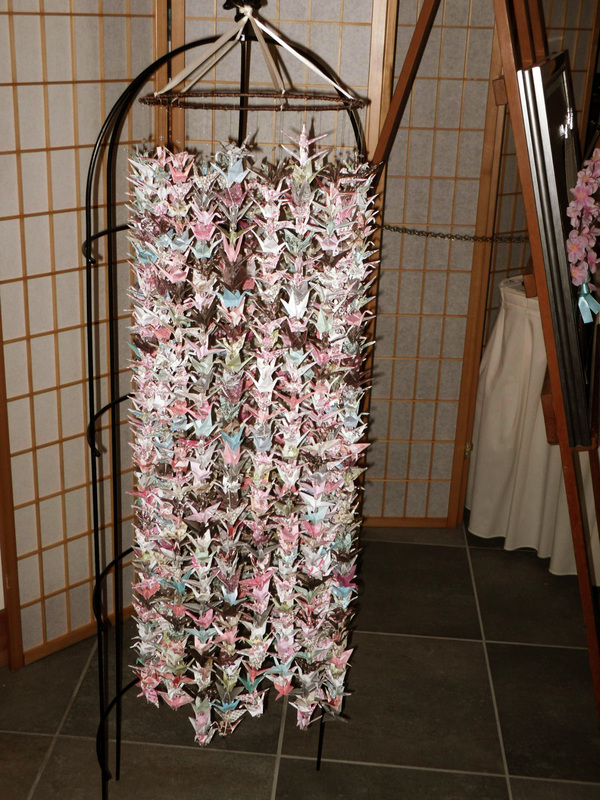
After a lot of searching I found the perfect hanging plant stand to hang the senbazuru from. It stood in the front of the reception area near the table assignments board.
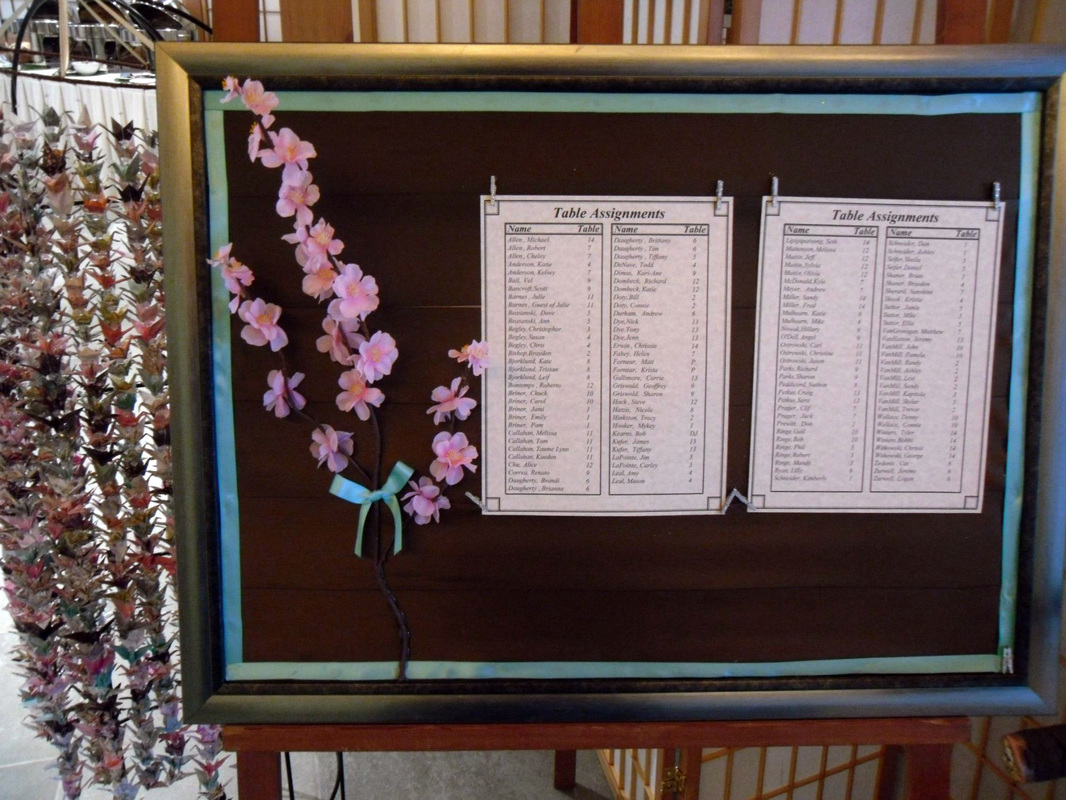
I only have one photo of the table assignments board, so I'll include it here. I found the frame for 90% off at Hobby Lobby. I glued wide brown satin ribbon across it (used the same ribbon in many other ways). The papers are attached by little glittery clothespins.
Placecards
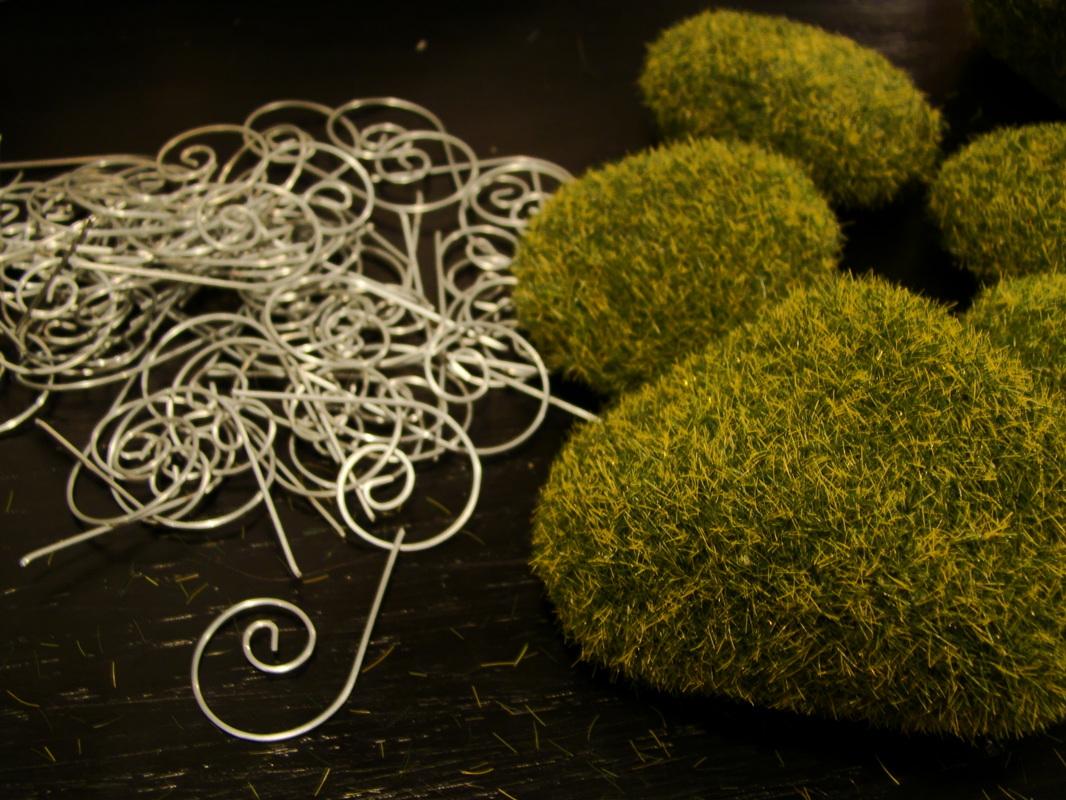
I wanted something different for the placecard holders and this worked out perfectly. I picked up a ton of Christmas ornament holders from the Dollar Tree because I noticed the spiral shape is just like the ones you see on placecard holders you can buy. They have two curly ends though, so I cut one off. I found these little moss stones at Dollar Tree too. There are like 5 or 6 in a pack for only $1!
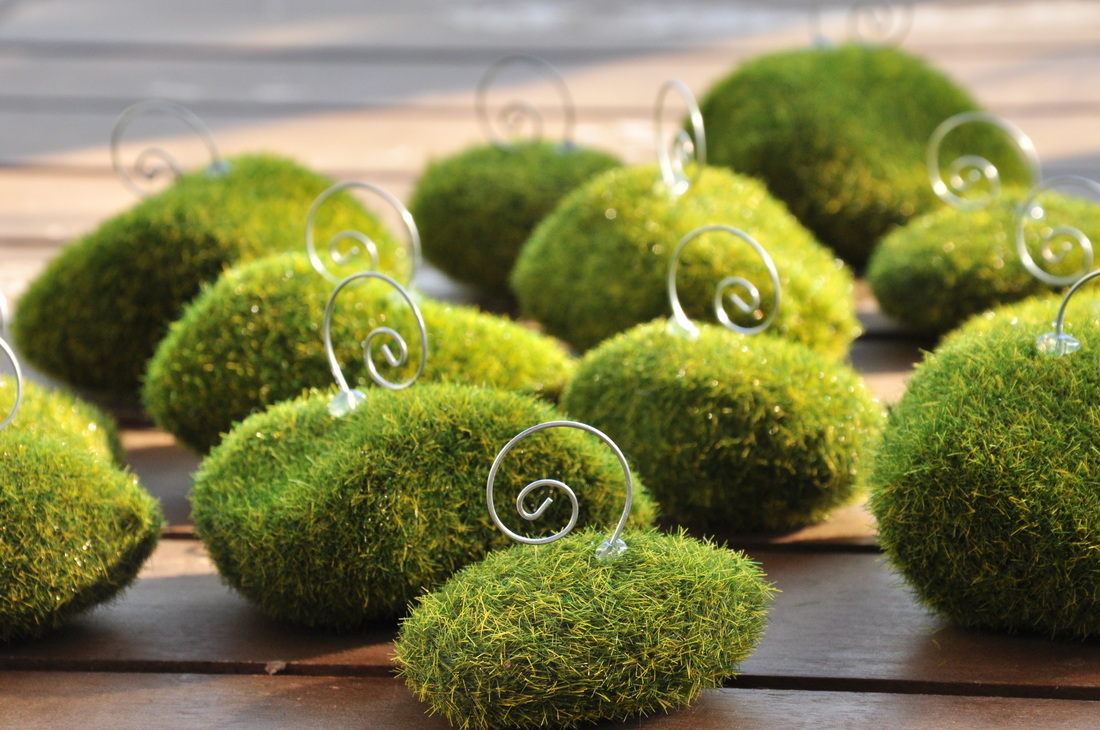
I just used a little drop of hot glue and shoved the pointy end into the styrofoam rocks. Quick and easy!
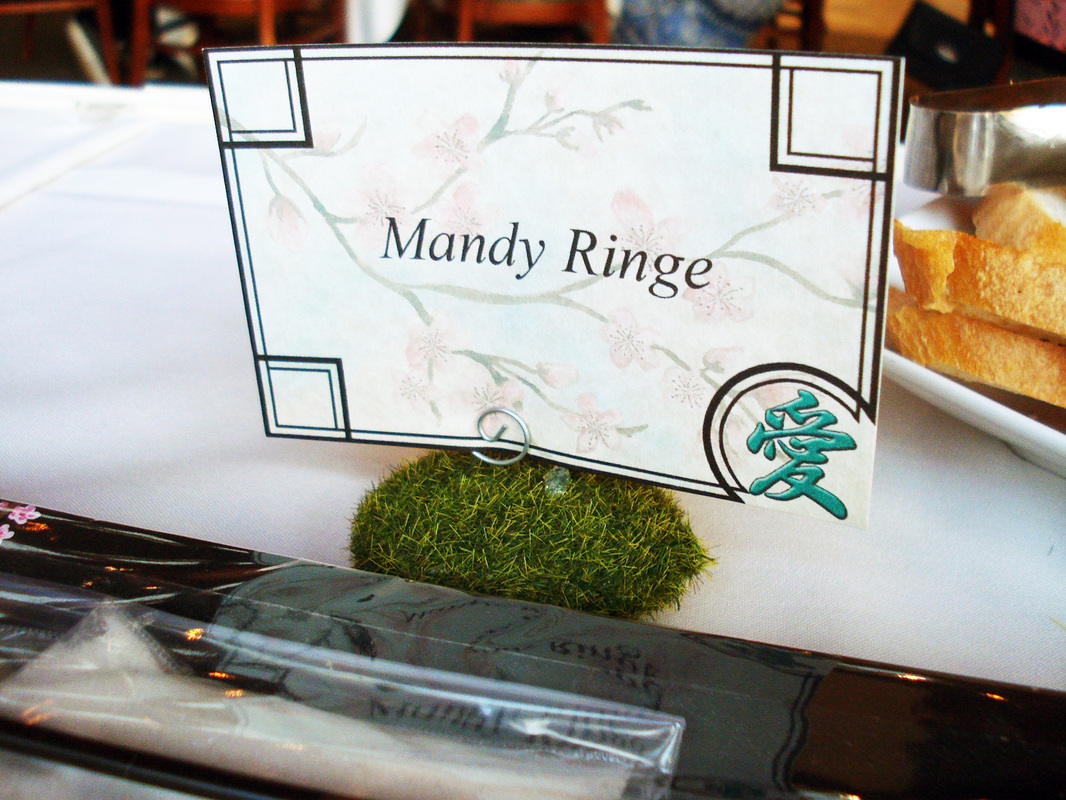
Rob designed the placecards. The symbol means love in Japanese and they were different colors (our wedding colors again) depending on whether people got pasta (like me), salmon (pink), or prime rib (brown)
Unity Painting
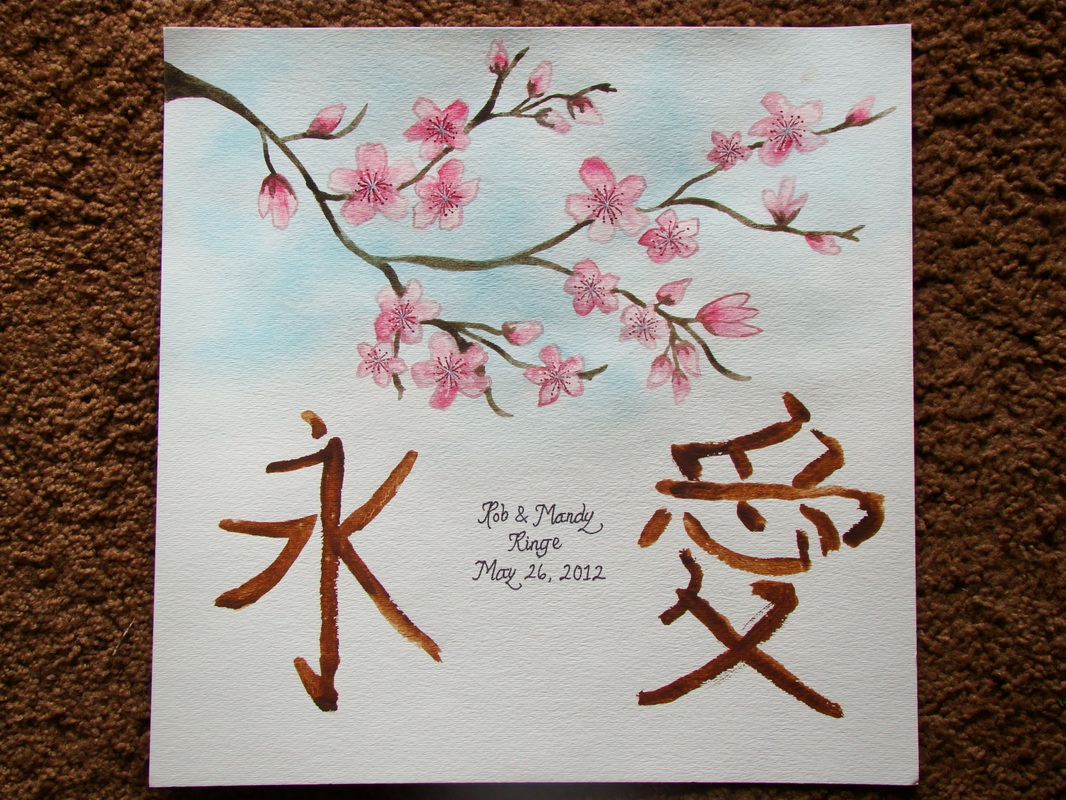
Instead of lighting a unity candle, or doing the sand pouring, we decided to do a unity painting. We are both artists, so it just made sense :) I had painted the cherry blossom branch to use in all of our printed items - our save the dates, invitations, placecards (see above), and inserts in the favors. We painted the symbols during the ceremony while my maid of honor played "Somewhere over the rainbow" by Israel Kamakawiwoʻole and played a ukulele. The left one means "forever", and the right is "love".
Wedding Favors
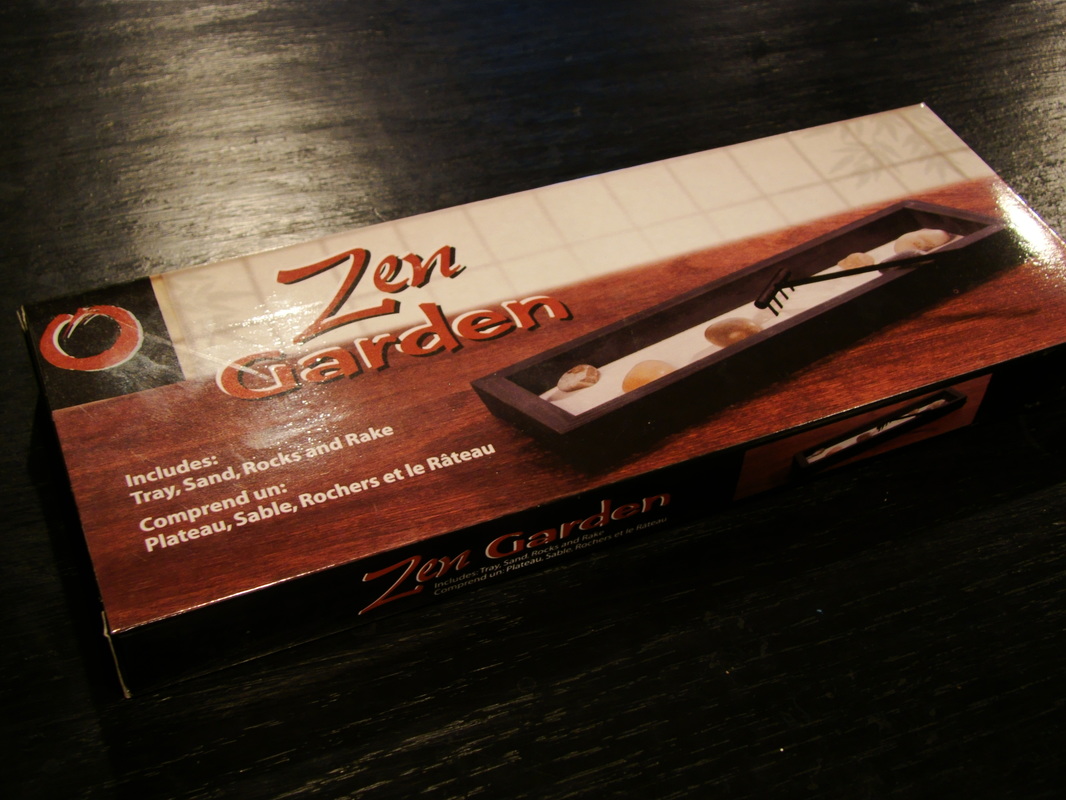
Our favors were easily one of the most time-consuming projects, but they turned out AWESOME. People still bring them up :) They started with this cute little zen garden from the Dollar Tree.
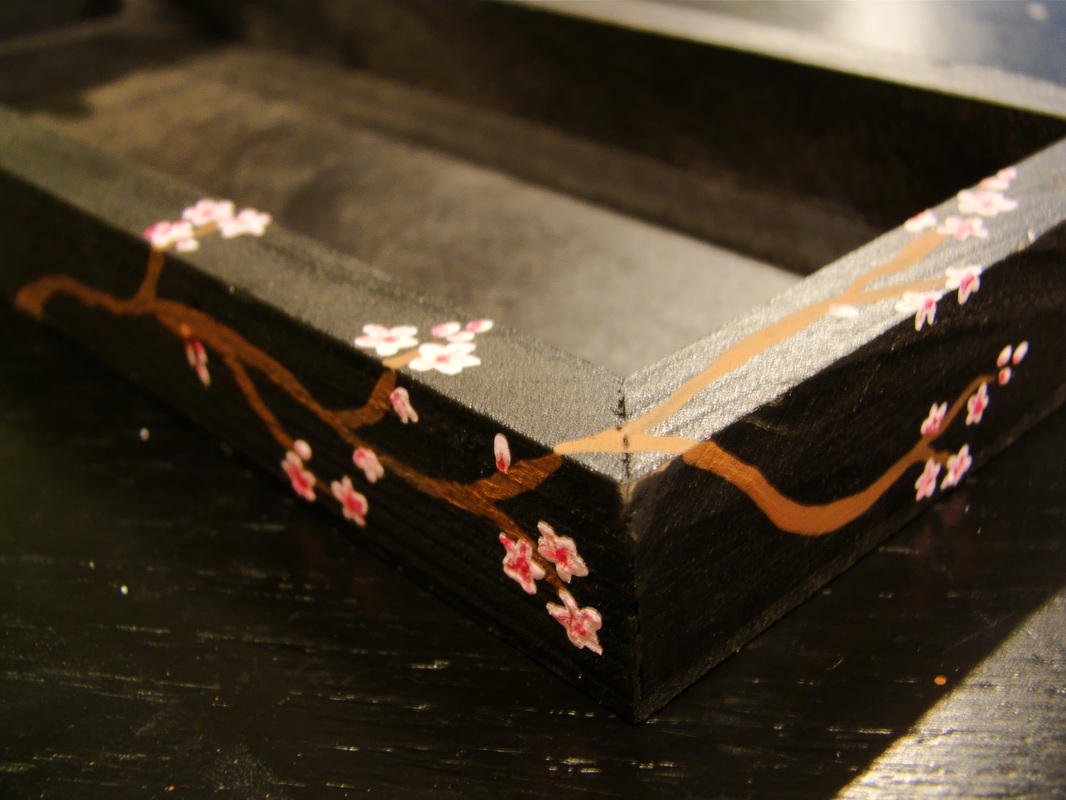
I hand painted the same cherry blossom design on each one
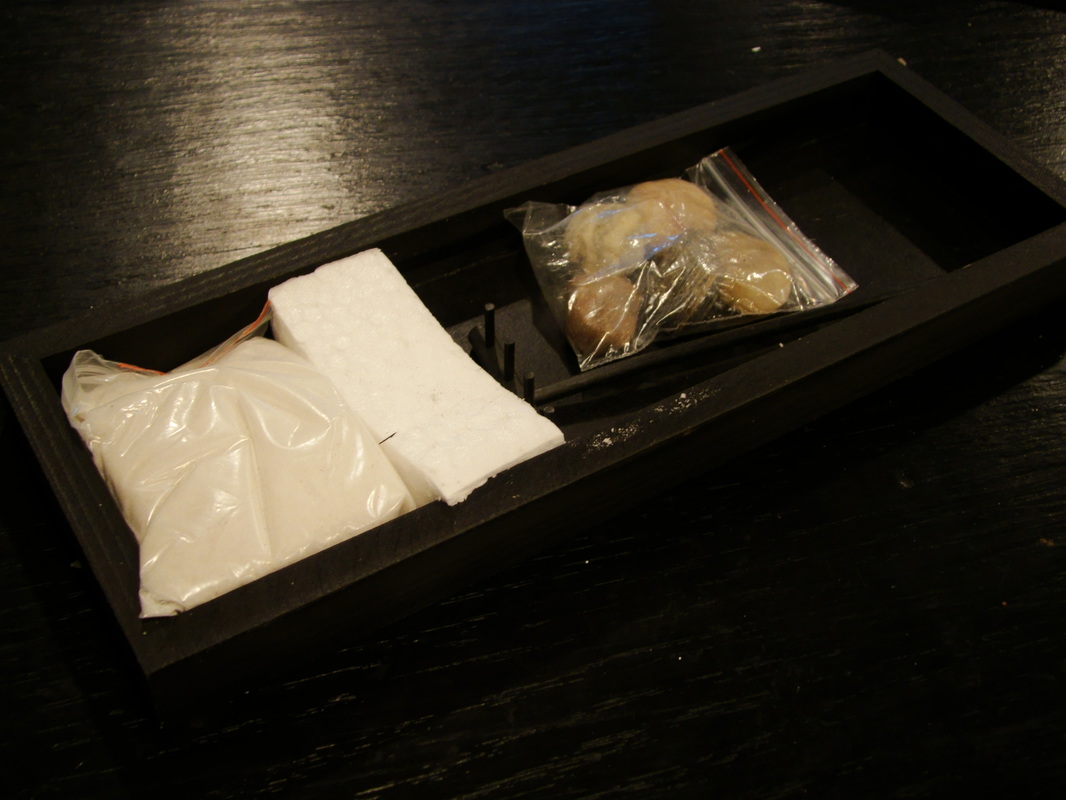
This is how they came packed. Boring and kind of ugly, plus not enough sand. I bought extra sand and repacked it in nicer bags. I also repacked the rocks.
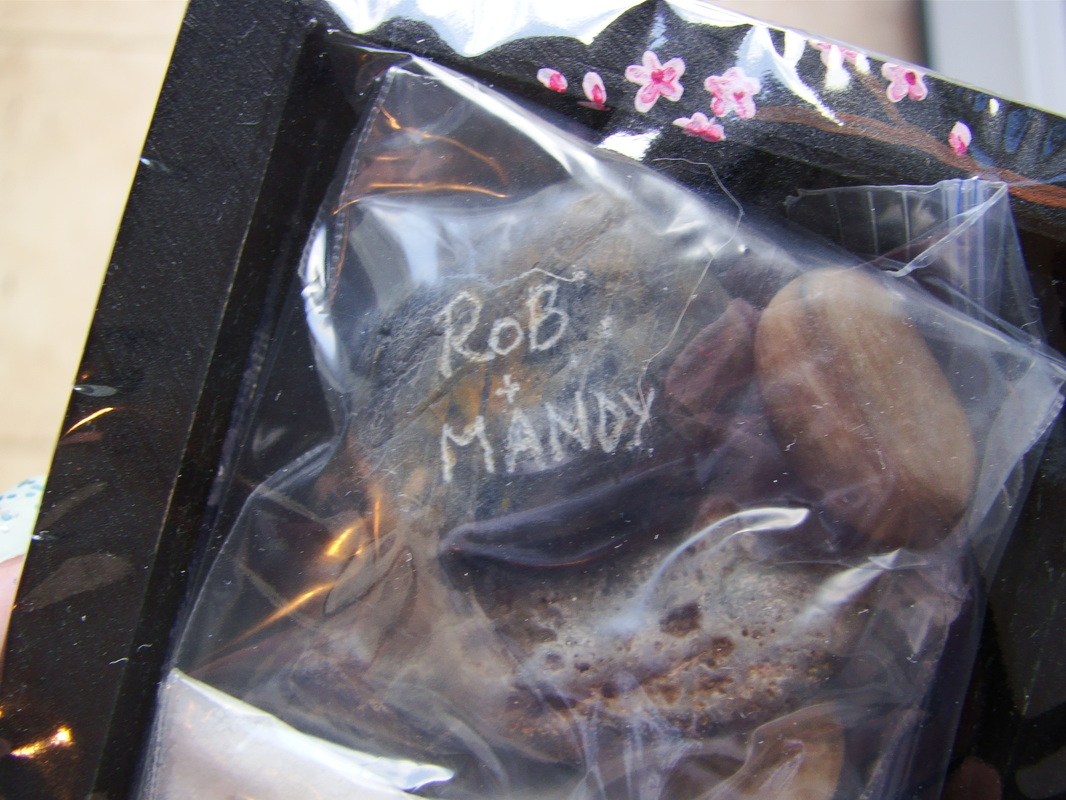
Rob also engraved river rocks that we added. The front had our names and the back had the date of the wedding

My maid of honor/best friend came over and we packaged them up assembly line style!
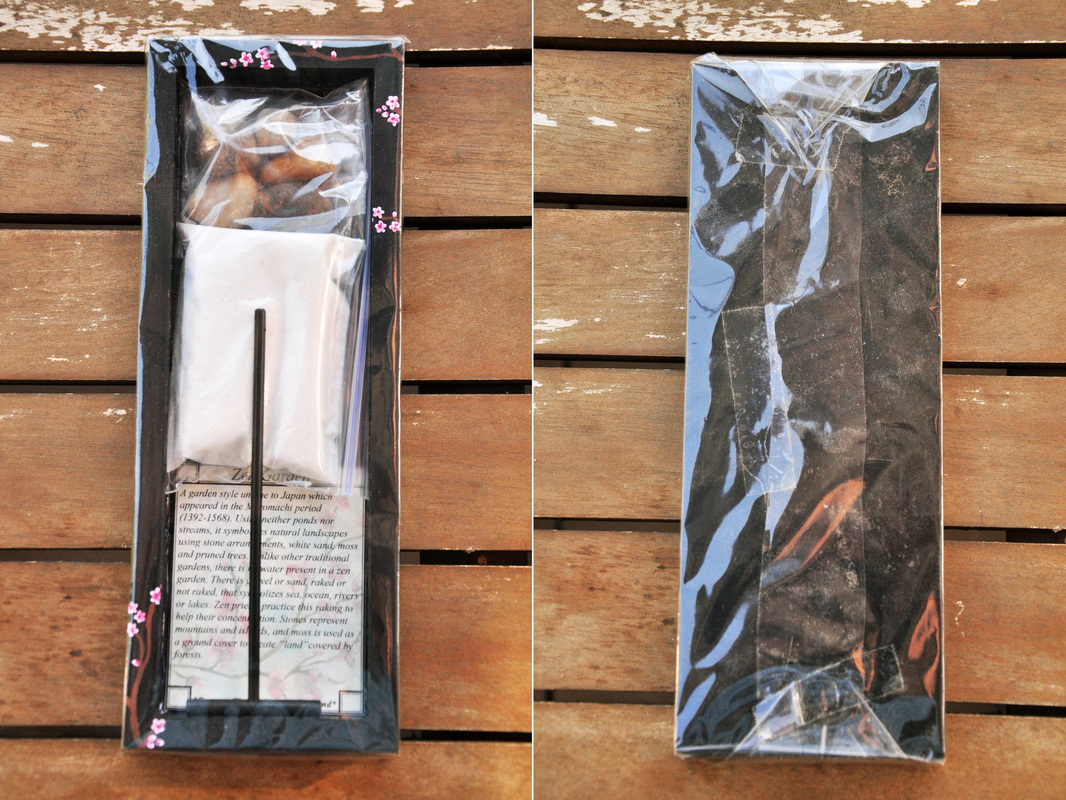
The finished product! We put down glue dots to keep the rocks and sand in place. I printed up little information cards that talked about the origin and meaning behind zen gardens. The little rake went in last and everything was held in place by a cellophane wrap. I couldn't have been happier with these.
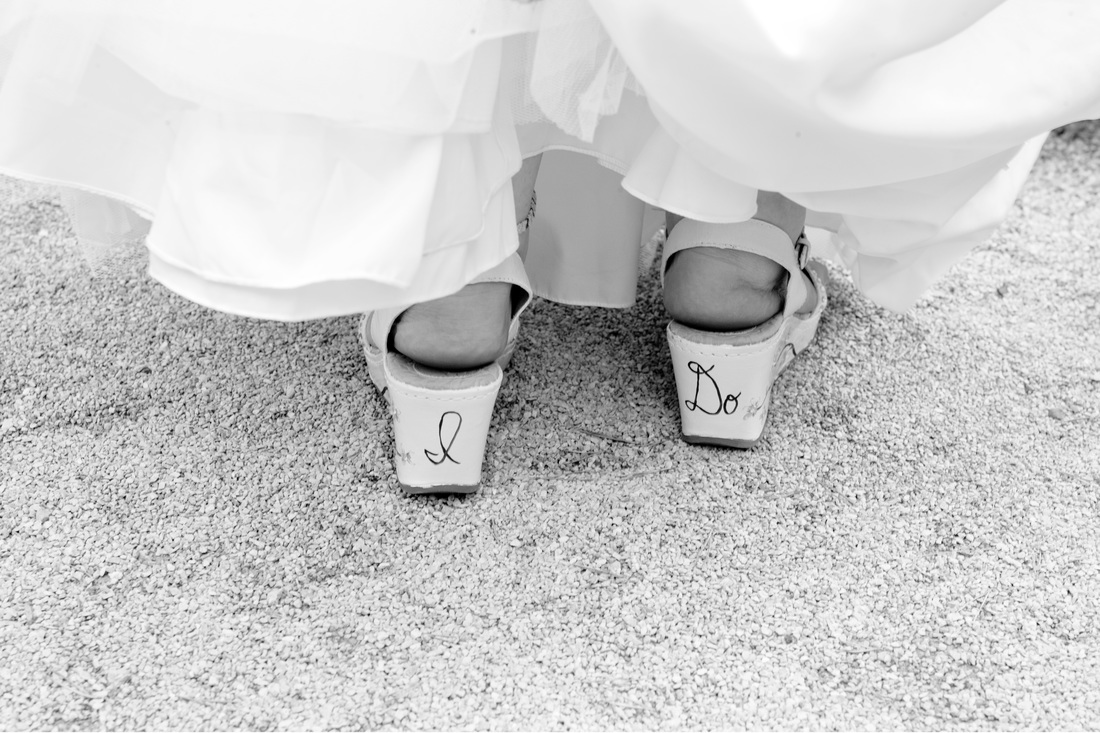
My Shoes
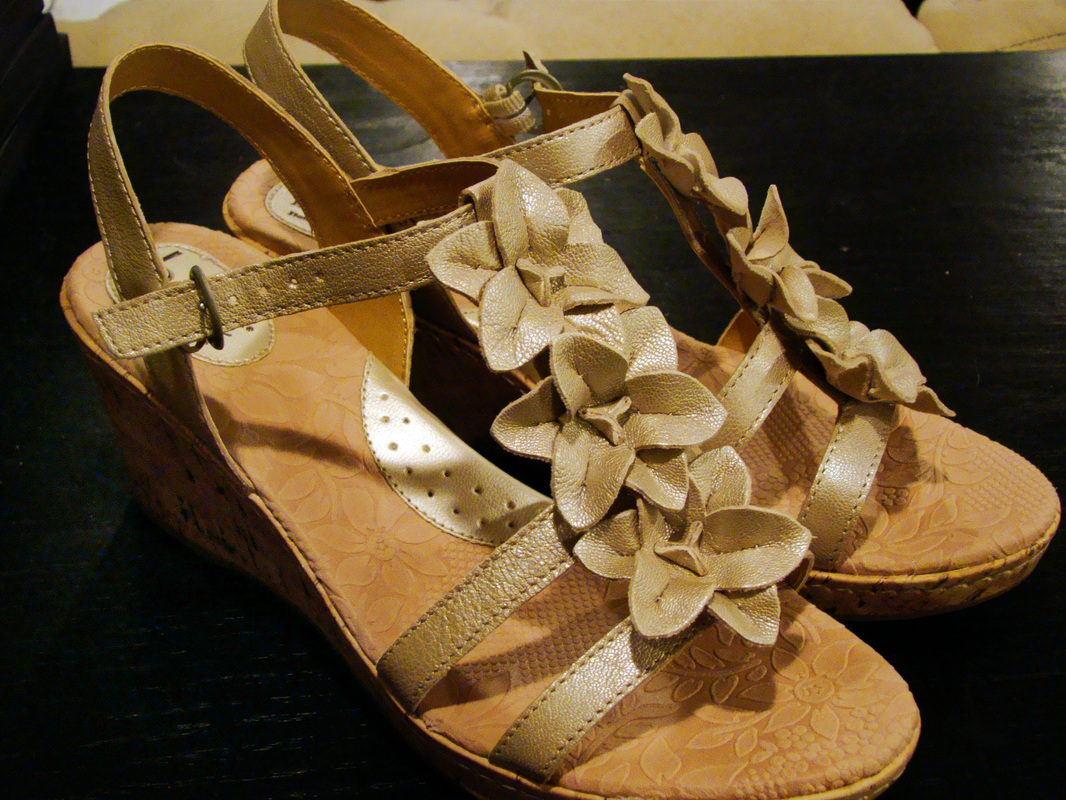
I absolutely hate buying shoes. I have big feet and I'm clumsy. High heels were never an option for me. Rob actually ran across these gems while we were on the hunt! I saw the possibilities right away.
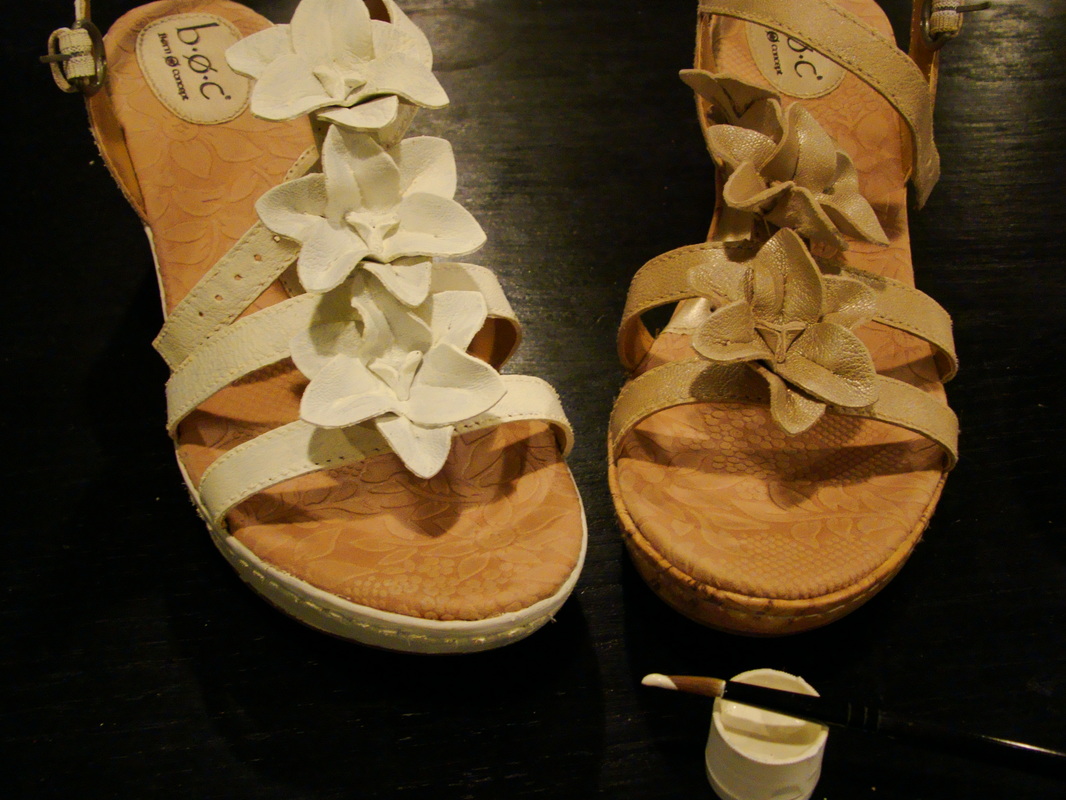
I sanded off the shininess so the paint would stick and then hand painted all the gold straps and the wedges with white acrylic.
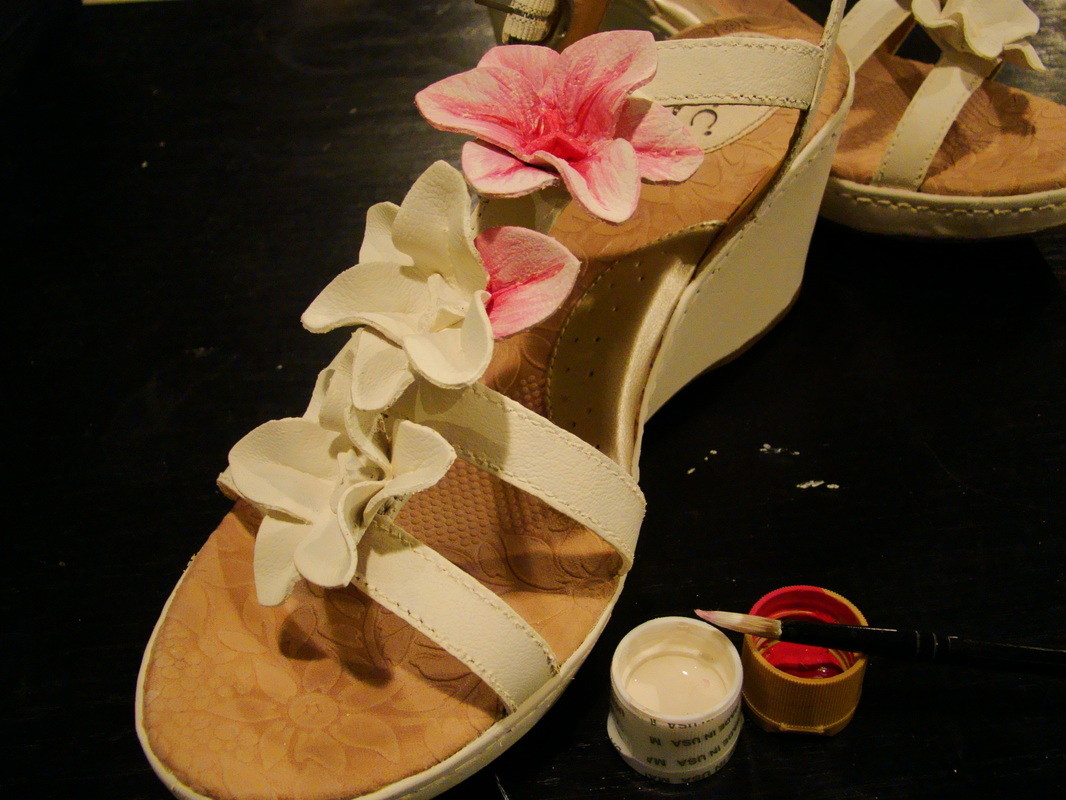
Though not shaped like cherry blossoms, the flowers looked pretty close after I painted the
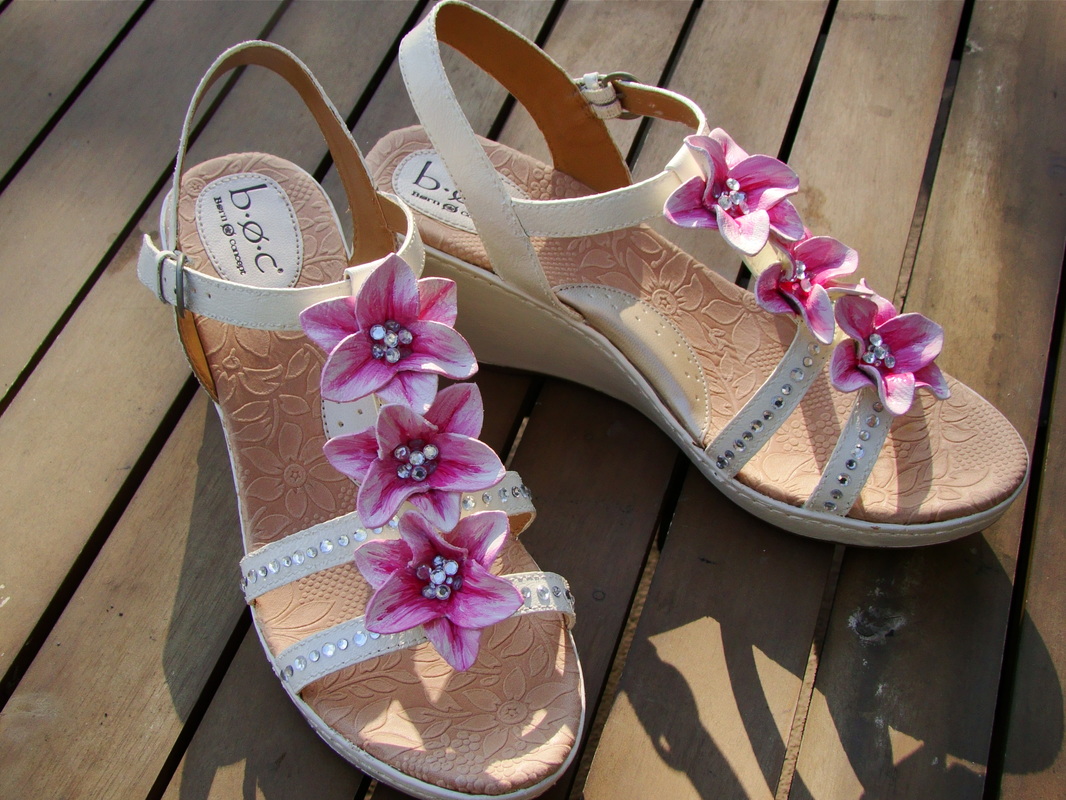
I also added some rhinestone bling!
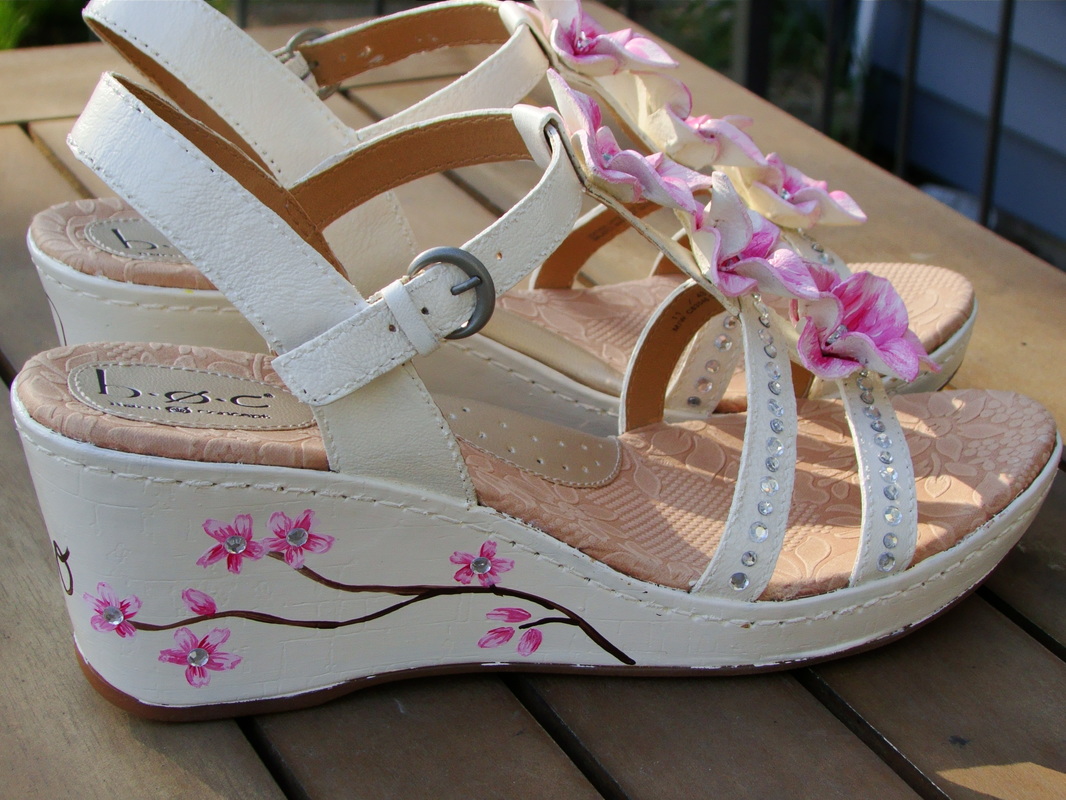
Painted cherry blossoms on the side, also with rhinestones

Painted "I Do" on the back :)
Garter
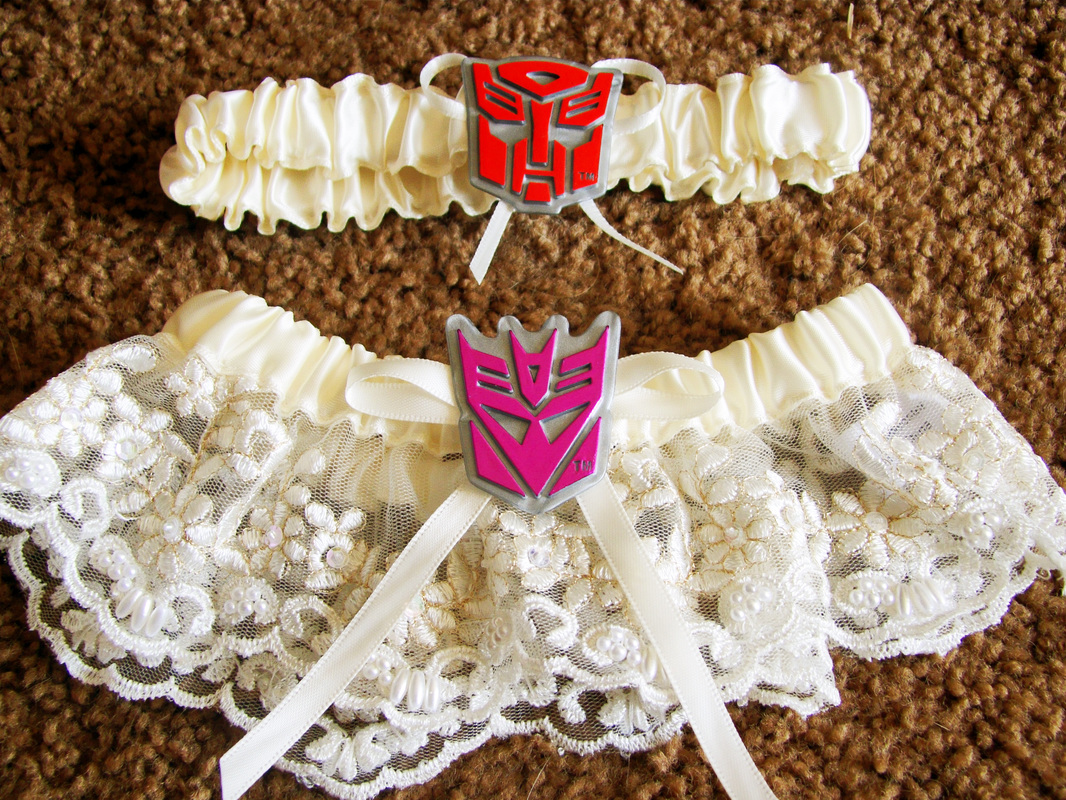
I added some Transformers logos to my garters (the one I wore and the one he tossed to the guys) because Rob lobes Transformers (I also got him Transformers cufflinks)
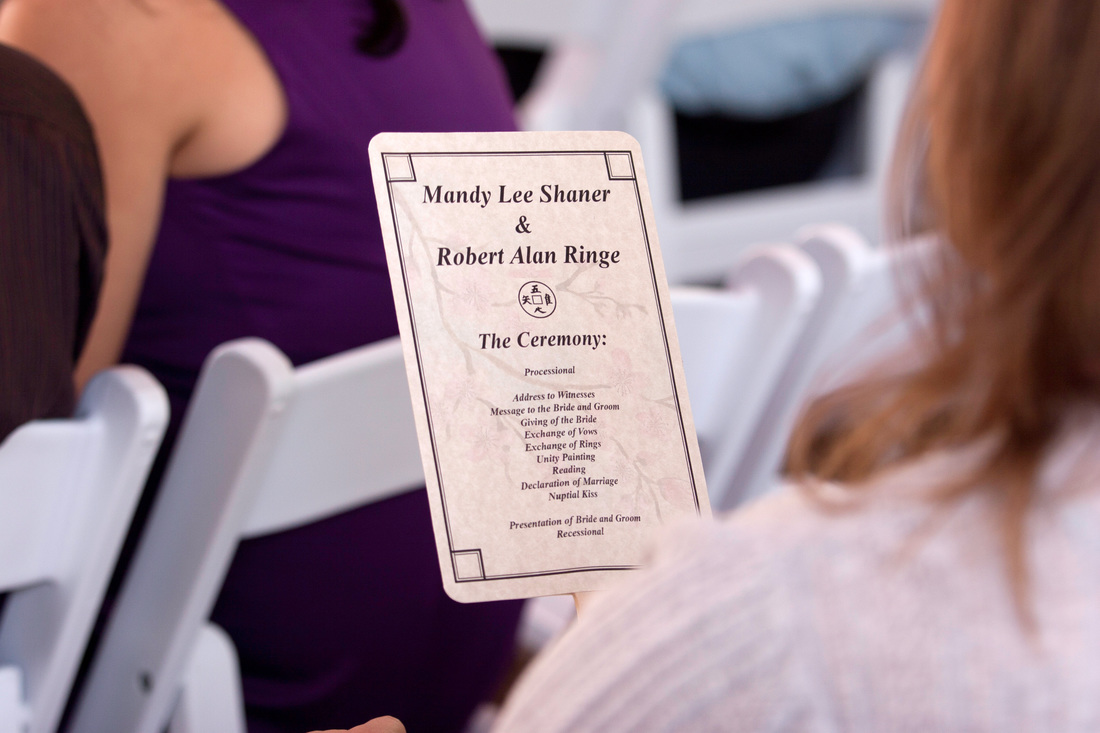
Programs
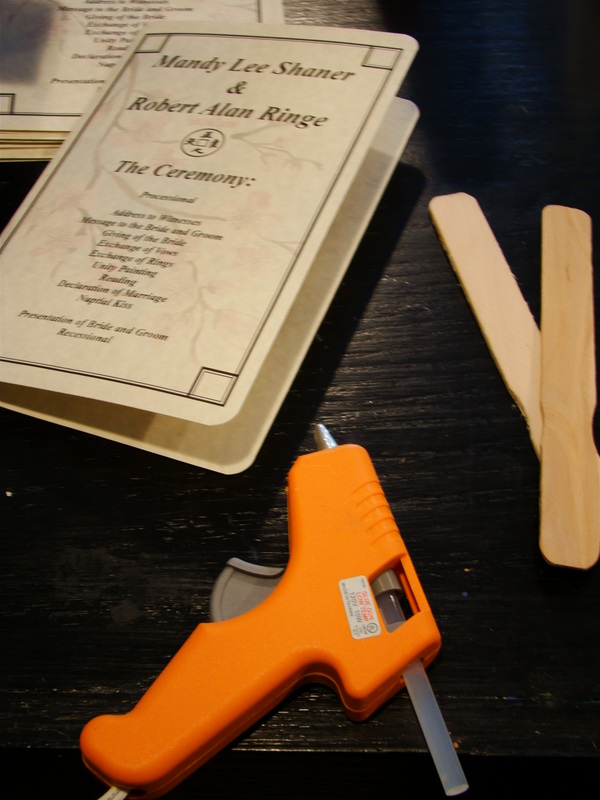
Rob designed our programs. We figured everyone uses their programs to fan themselves anyway, so we designed them to be fans!
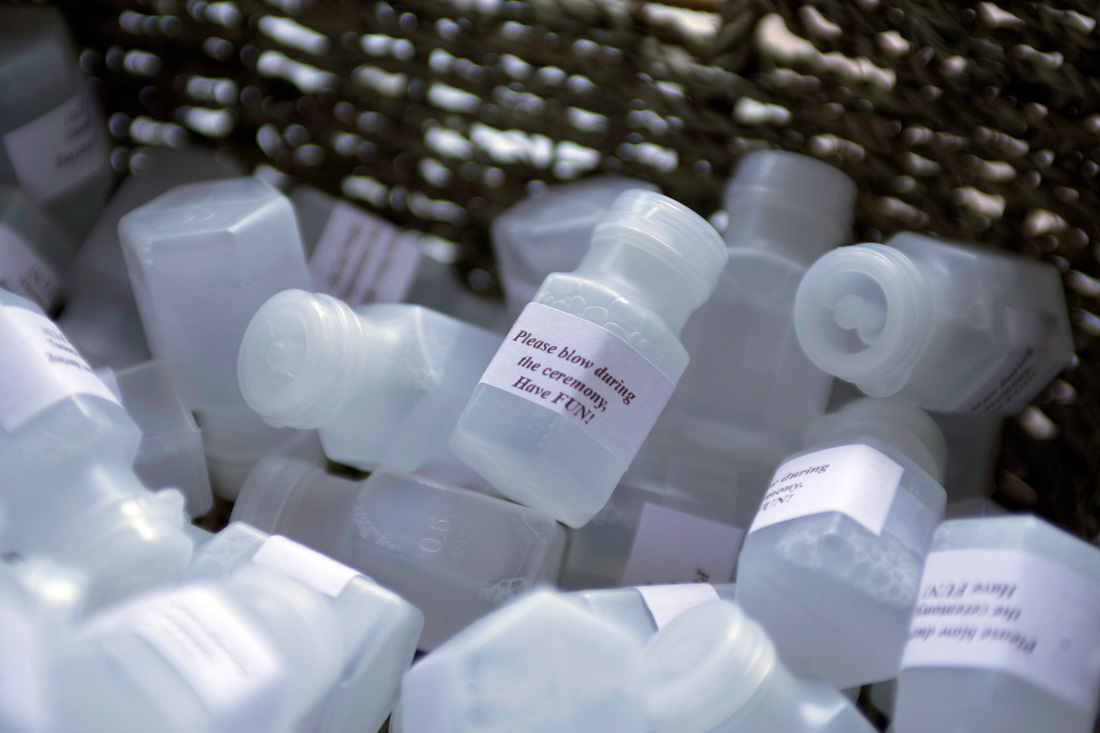
There was a basket of bubbles next to the programs. I attached all those little pieces of paper. It was so cool to have bubbles everywhere during the ceremony :)
Groom's Cake
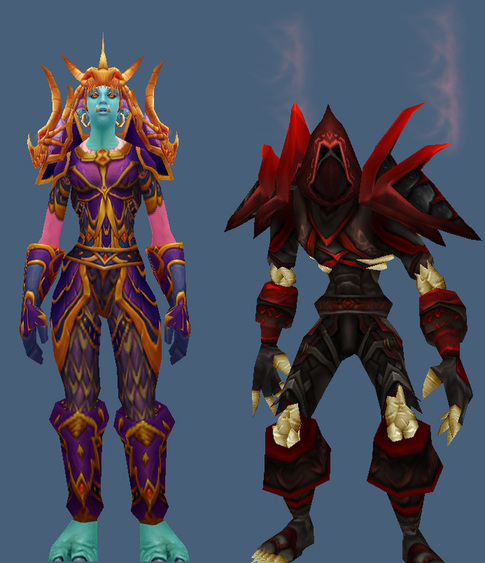
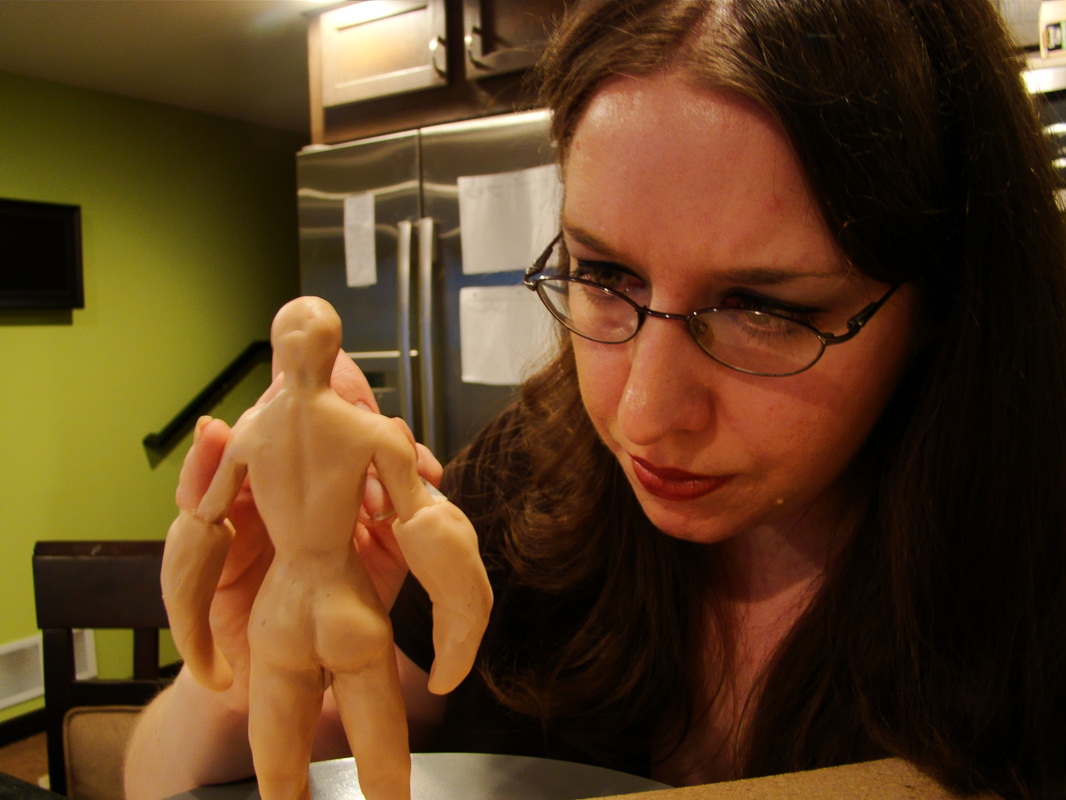
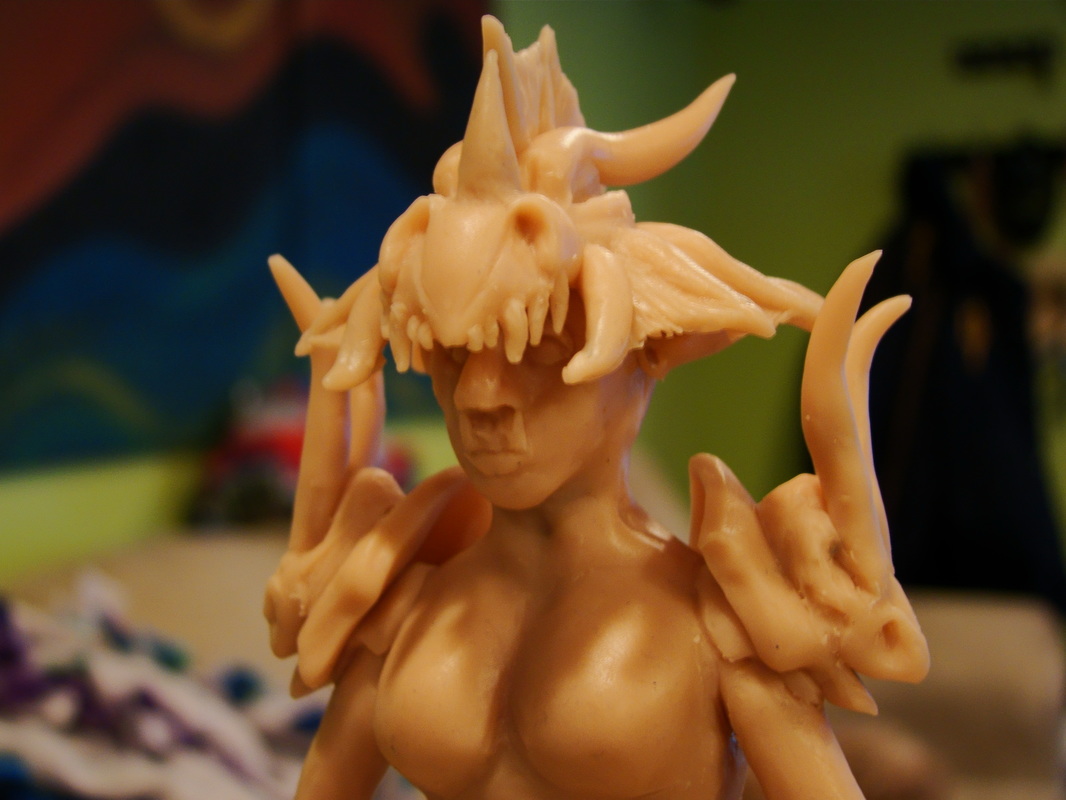
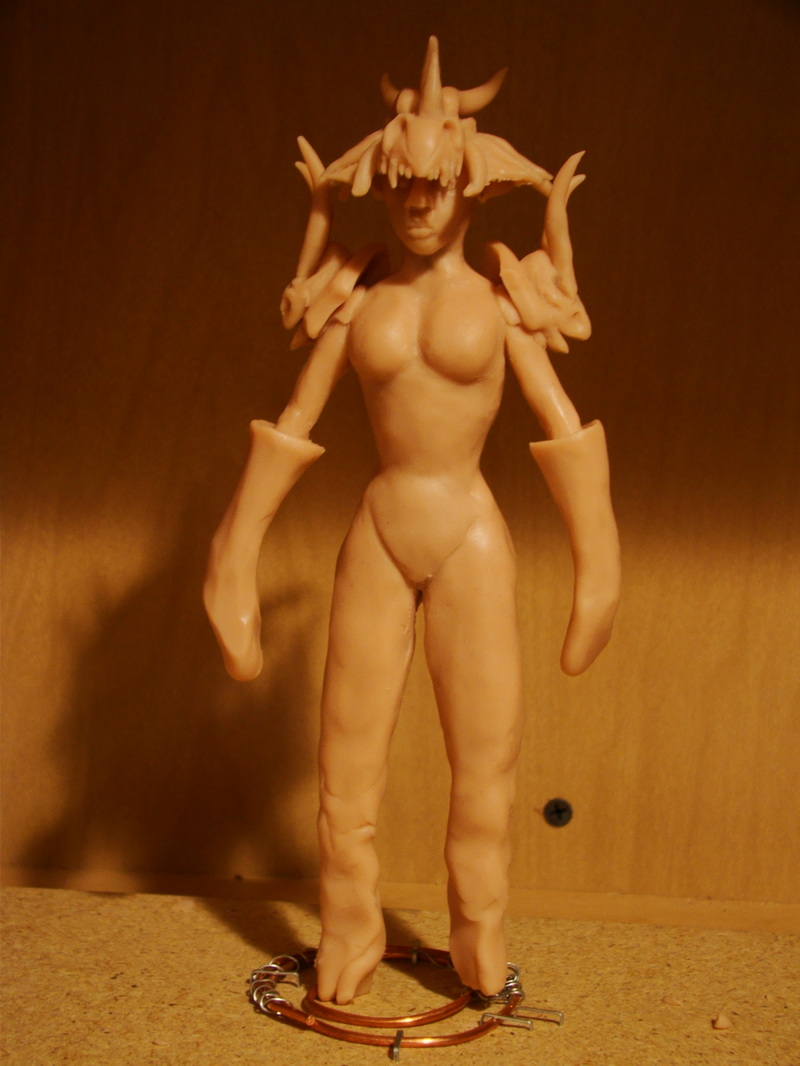
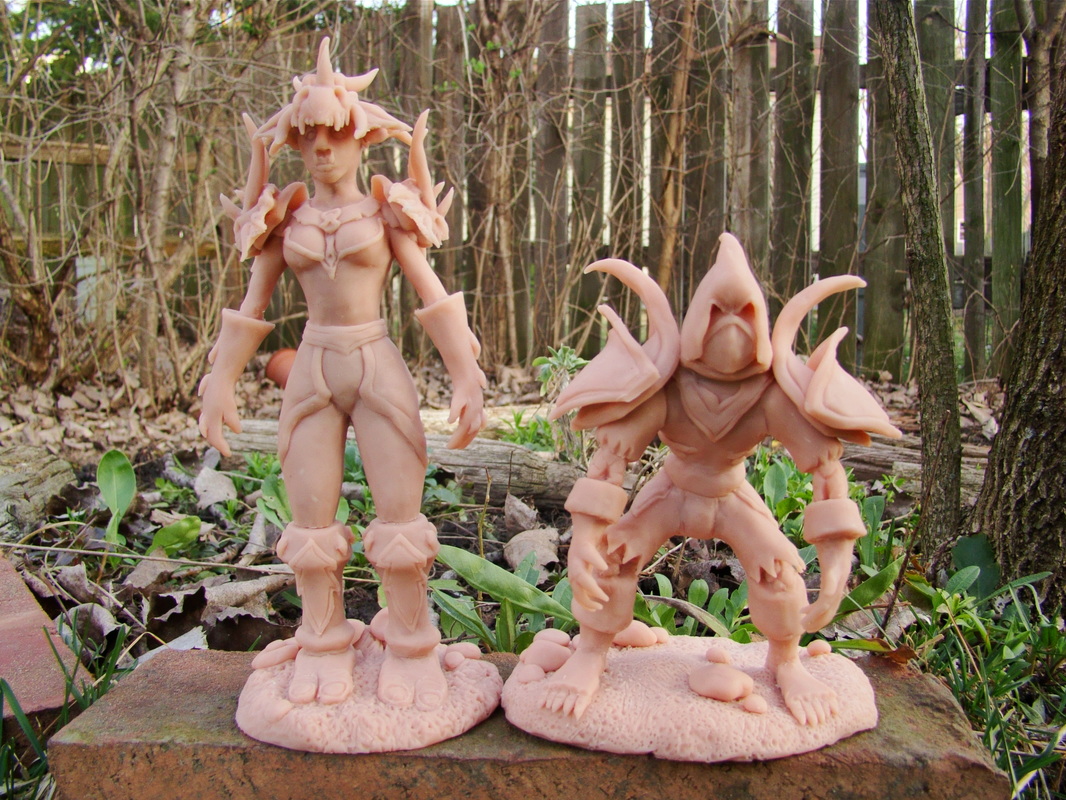
Rob and I met while playing the online game World of Warcraft. It seemed so fitting to include that in our wedding somehow. I decided to do a groom's cake for him with our characters as the cake toppers. This was a HUGE undertaking, and I literally finished the sculptures the night before our wedding. They turned out so amazing, I couldn't believe how awesome they looked.
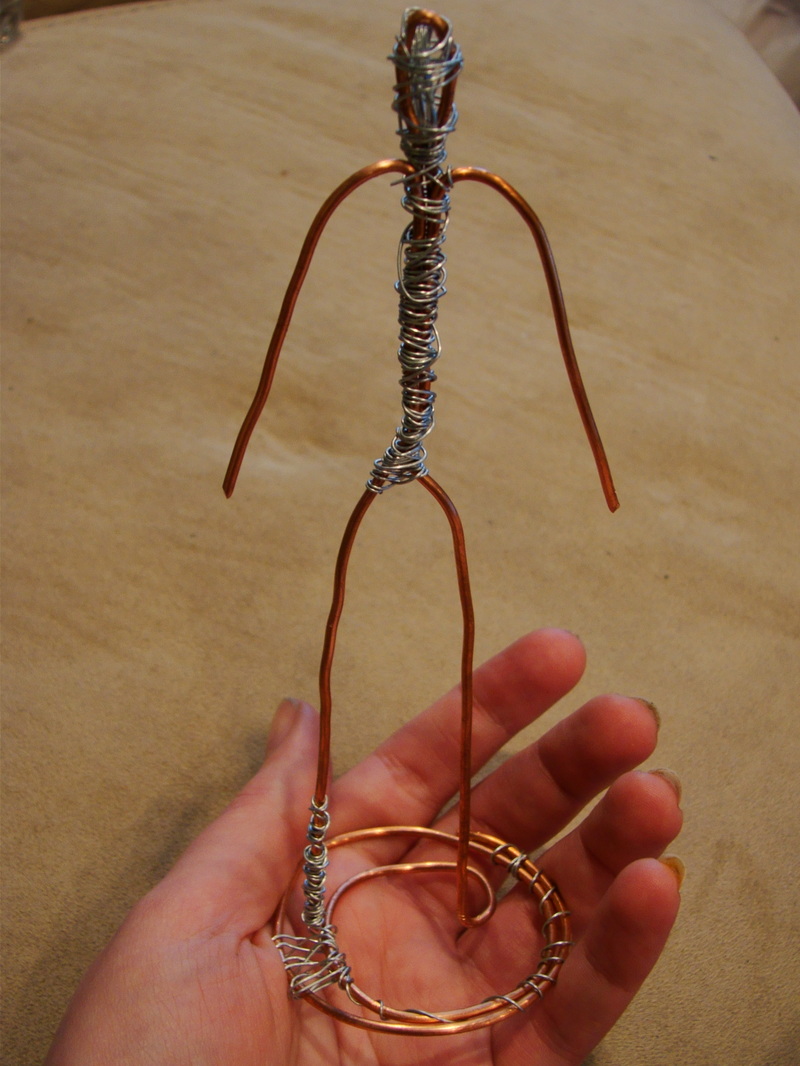 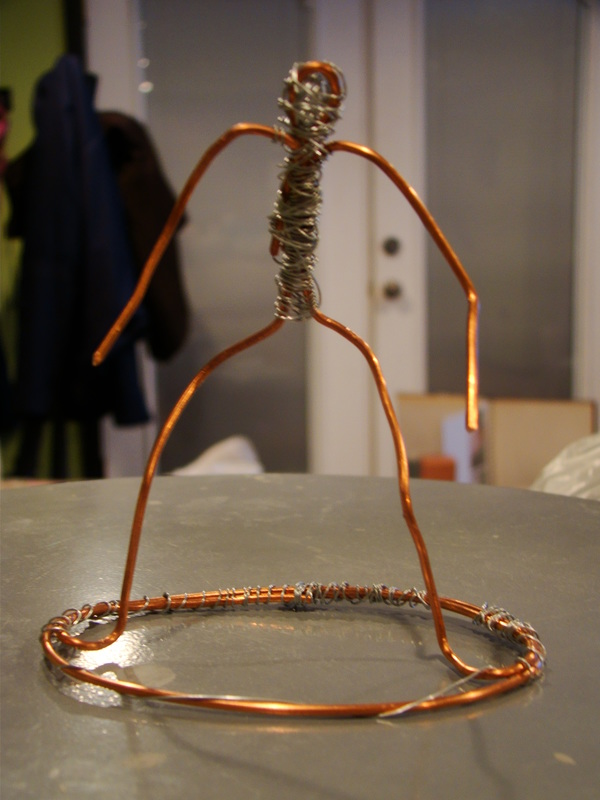 | 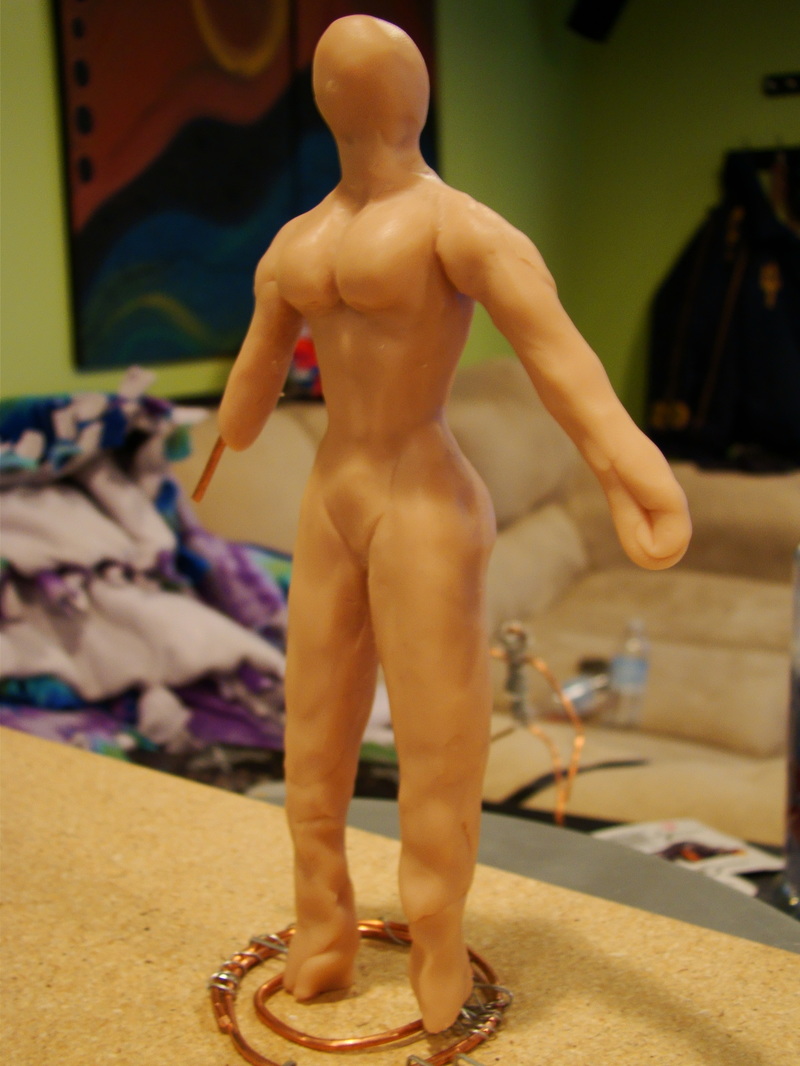 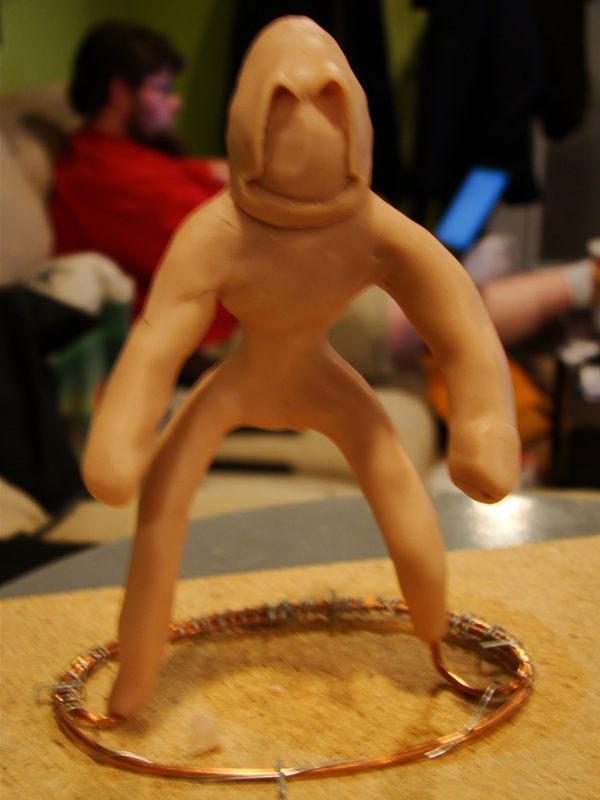 |
Each sculpture started out as a copper wire frame that I globbed a bunch of sculpy clay onto. This was my first time doing a sculpture like this.
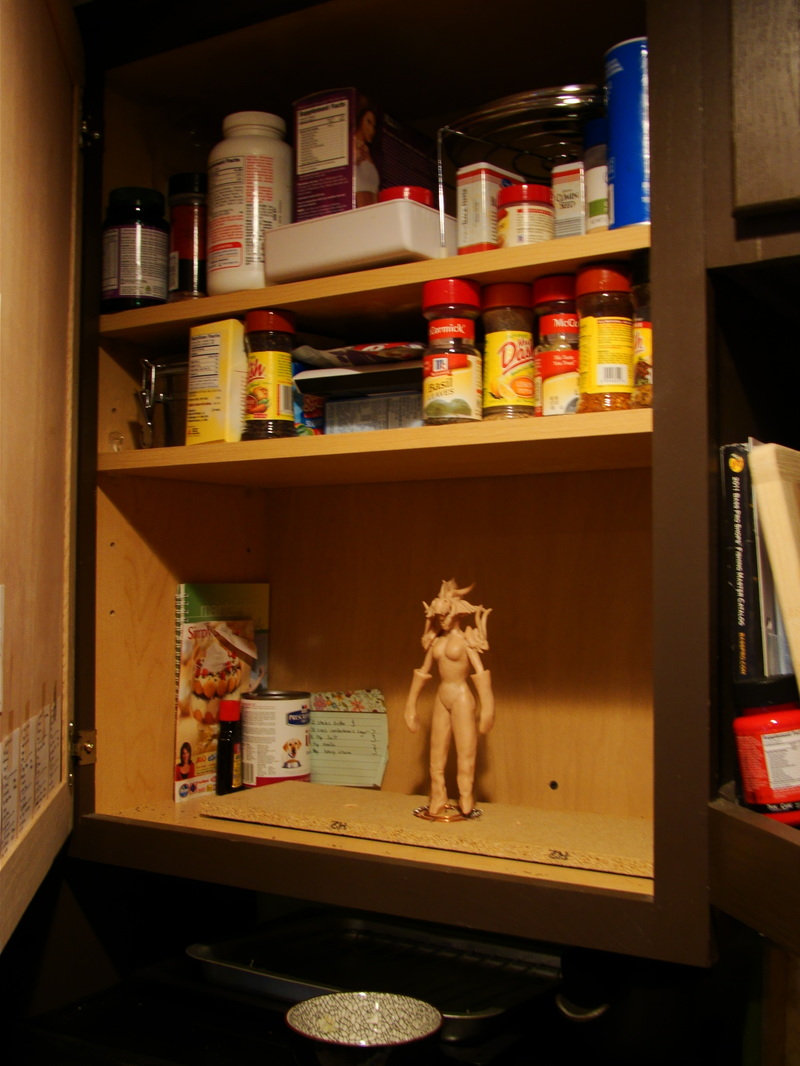 |  |
The wire base was stapled to a board, which I stored in my spice cabinet when I wasn't working on it
I made sure to take some pics before I baked them - I was so afraid they were going to crack and break
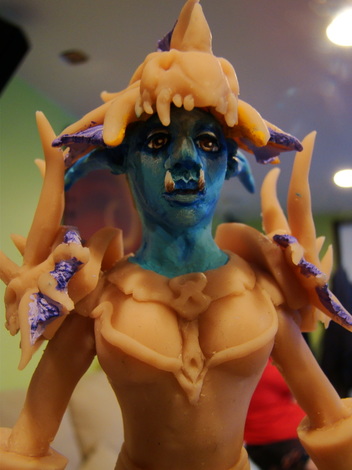 | 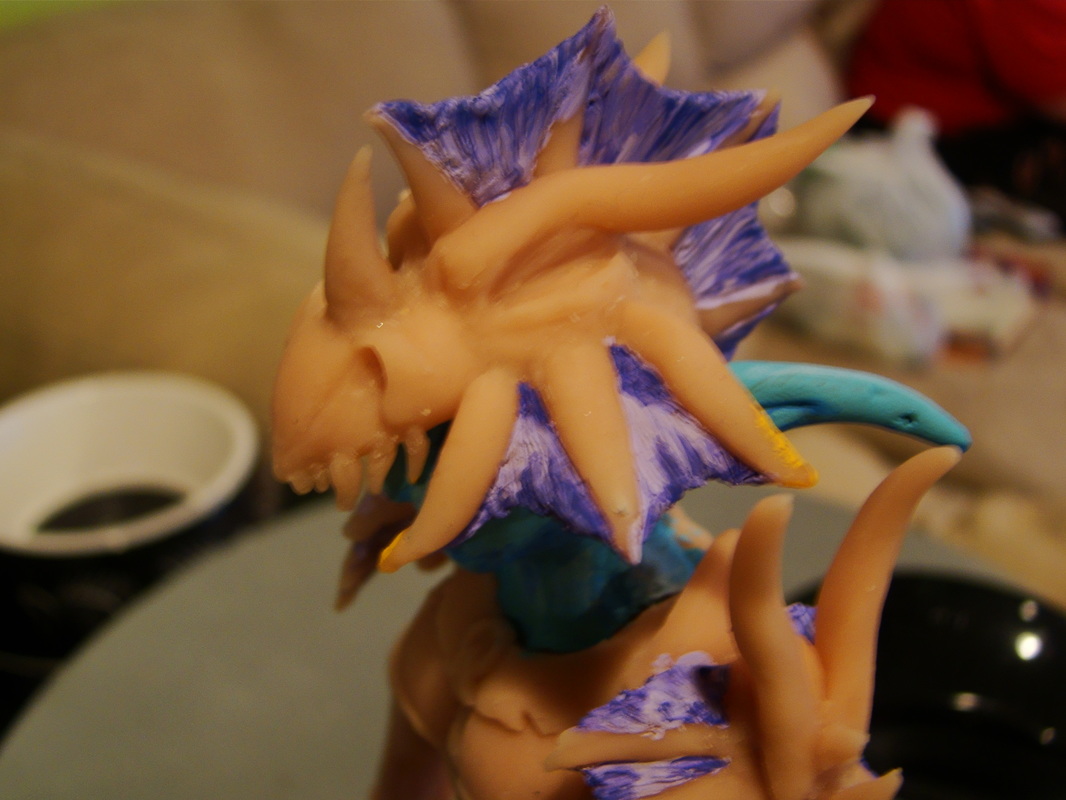 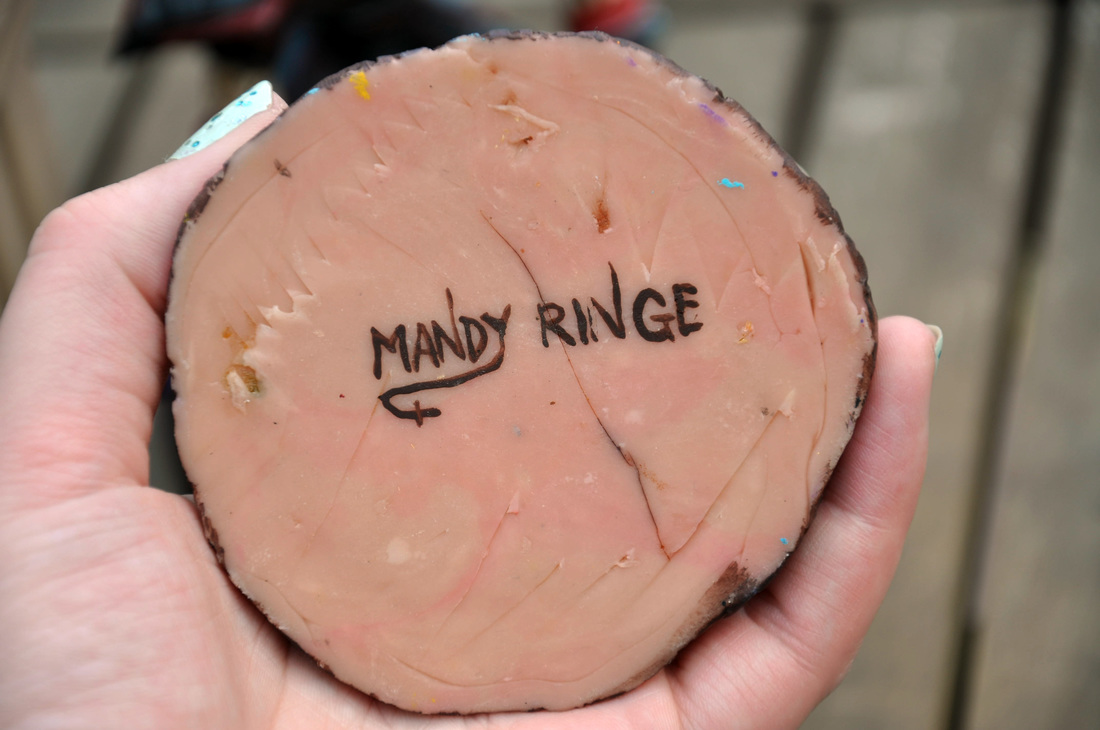 |
I hand painted and signed them both. I don't even know how many hours it took, it was definitely a labor of love!
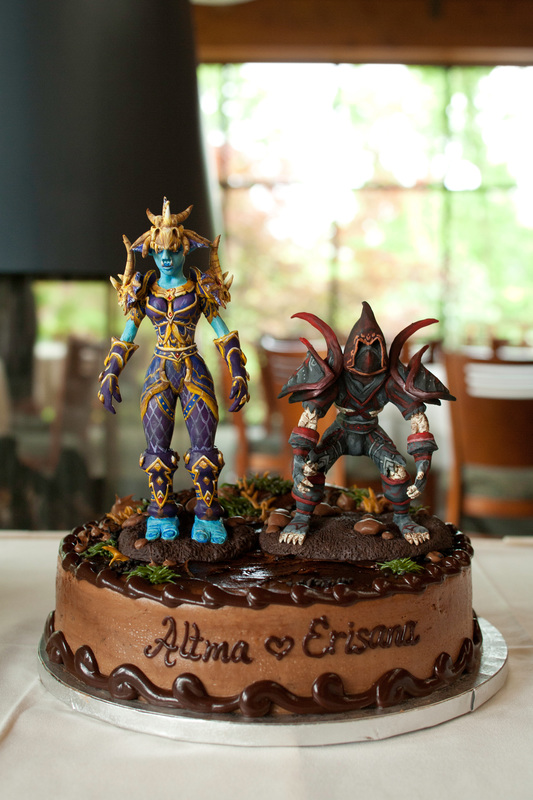
I designed and decorated the cake to look like an outdoor area. It was chocolate cake with cherry filling
Wedding Cake
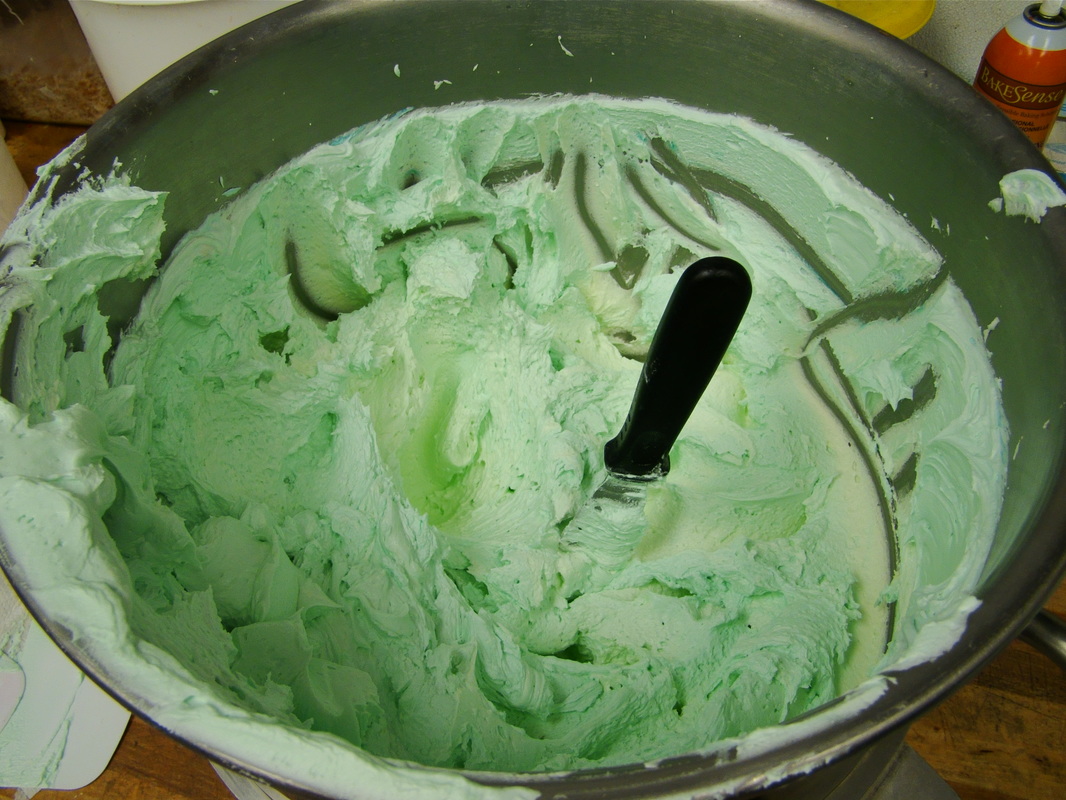
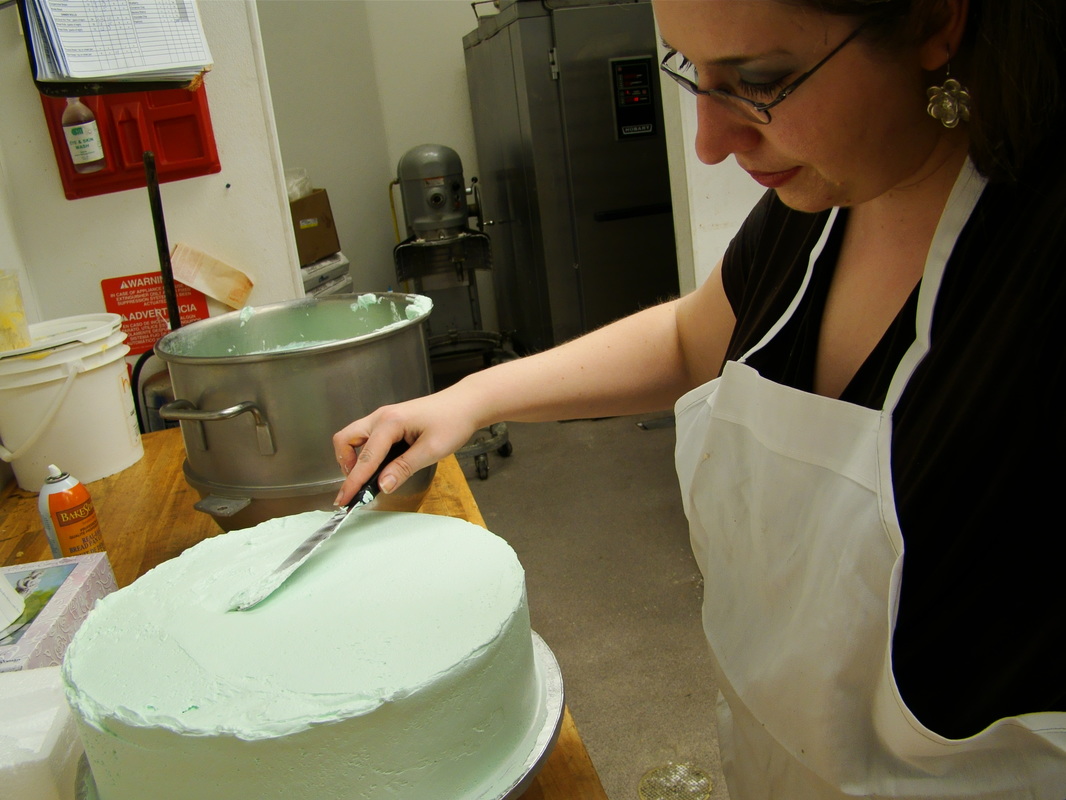
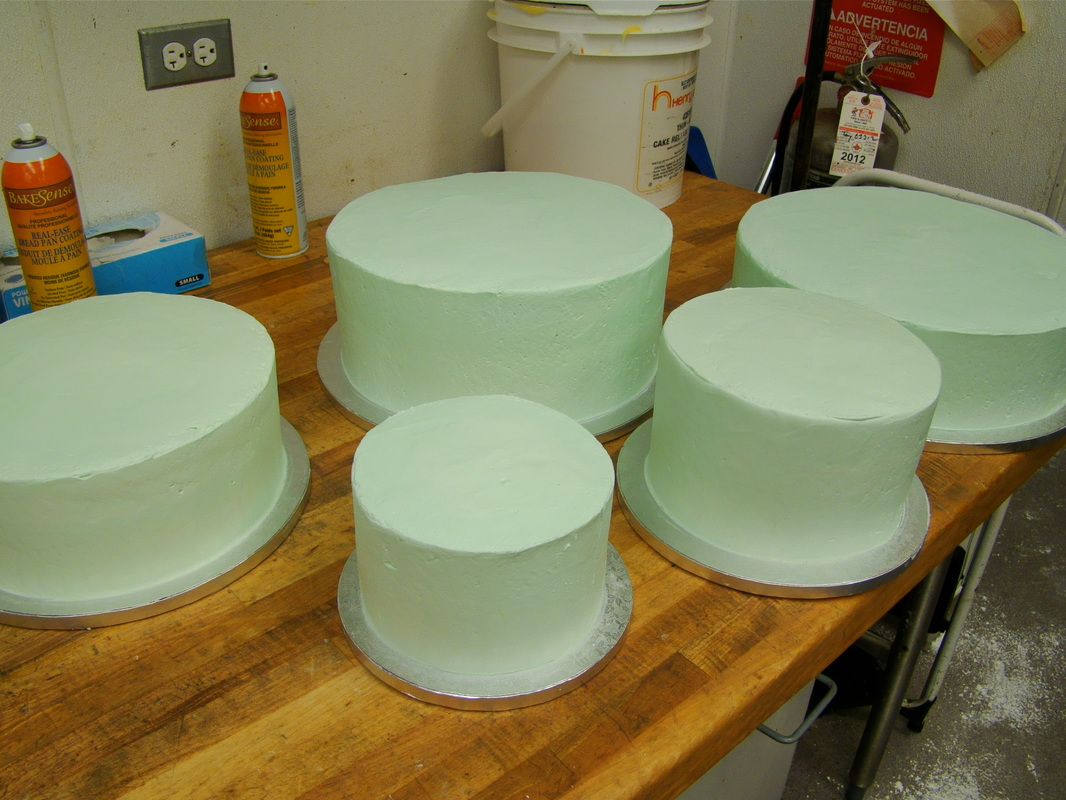
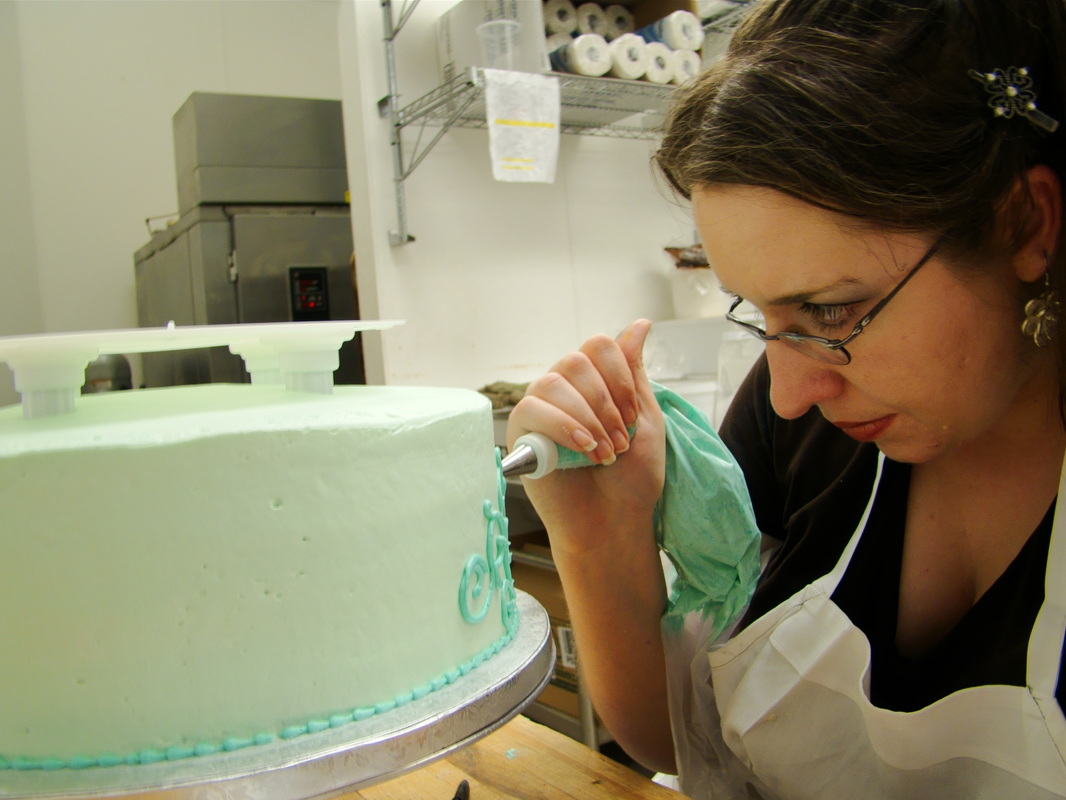
Being a cake decorator at the time, I knew right away that I wanted to design and decorate my own wedding cake :) The cake I made could have fed 500 people! I wanted to go big and I made no apologies :) It was nice because people were welcome to take more than one slice and each layer was a different delicious flavor.
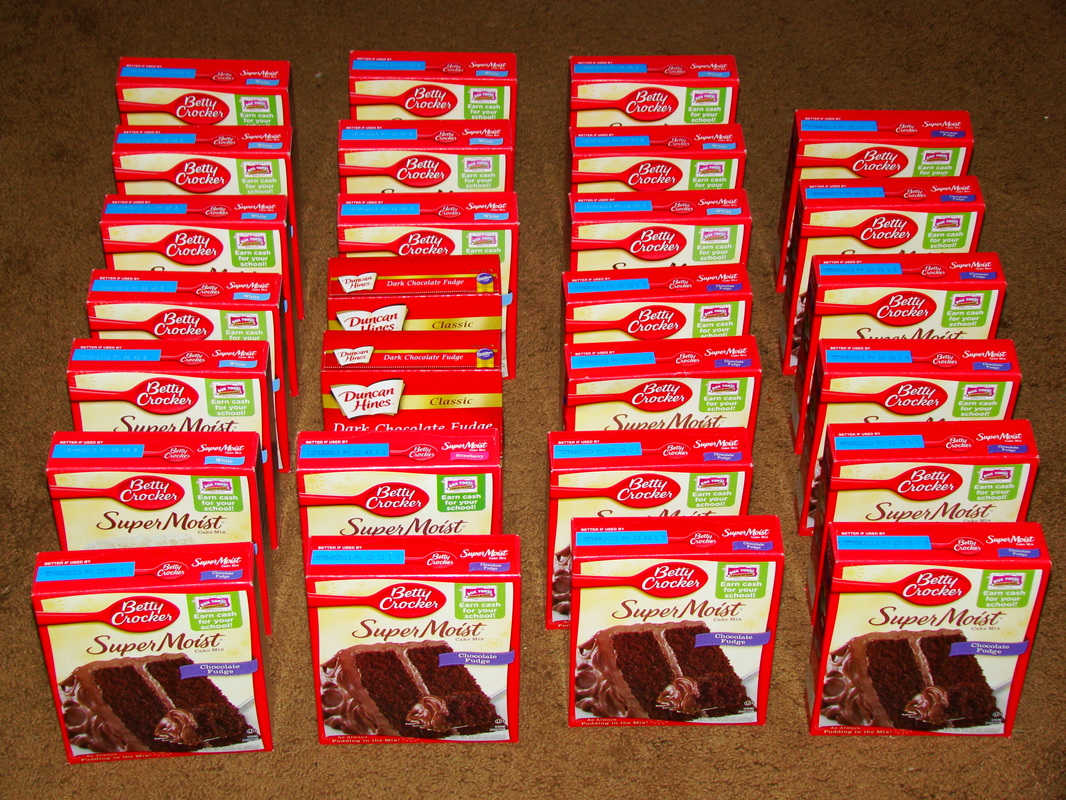 | 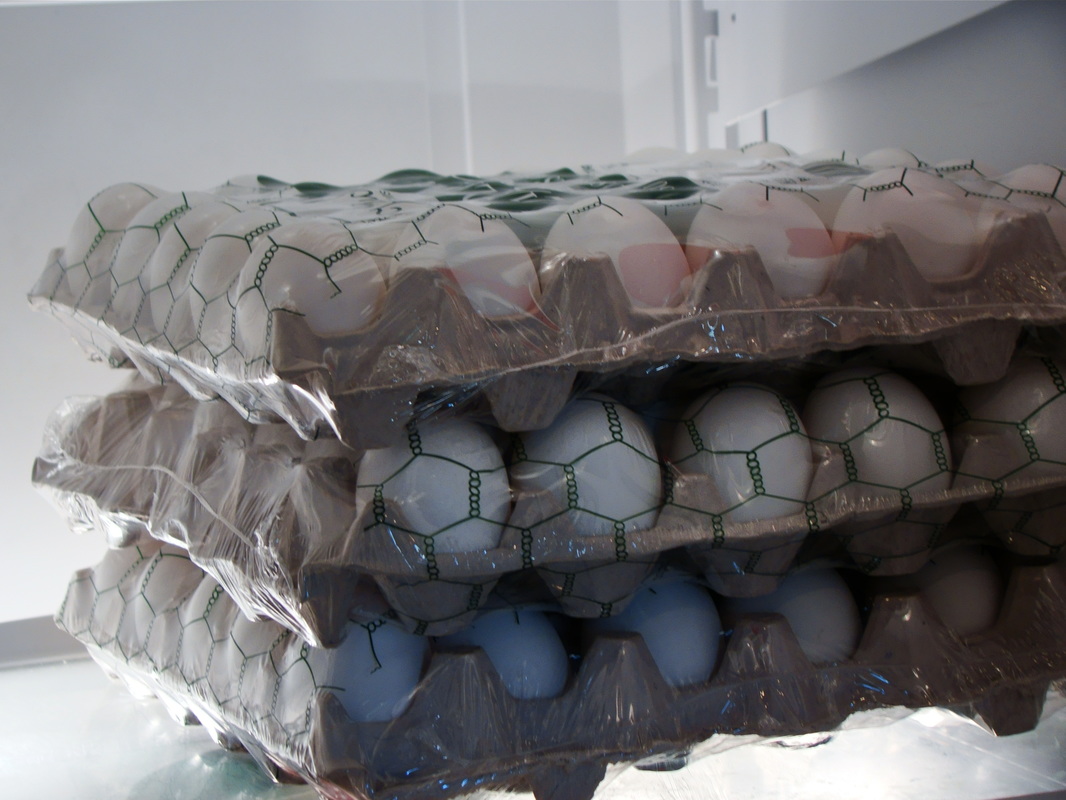 |
I initially planned on baking the cake layers myself
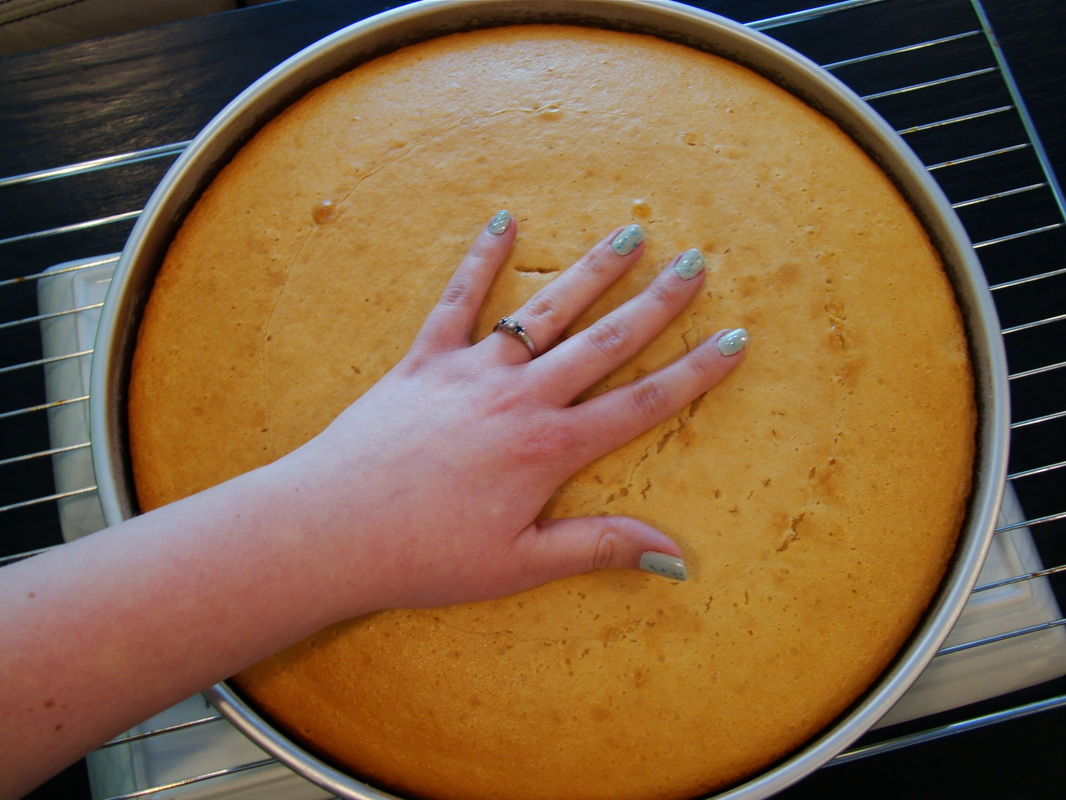 | 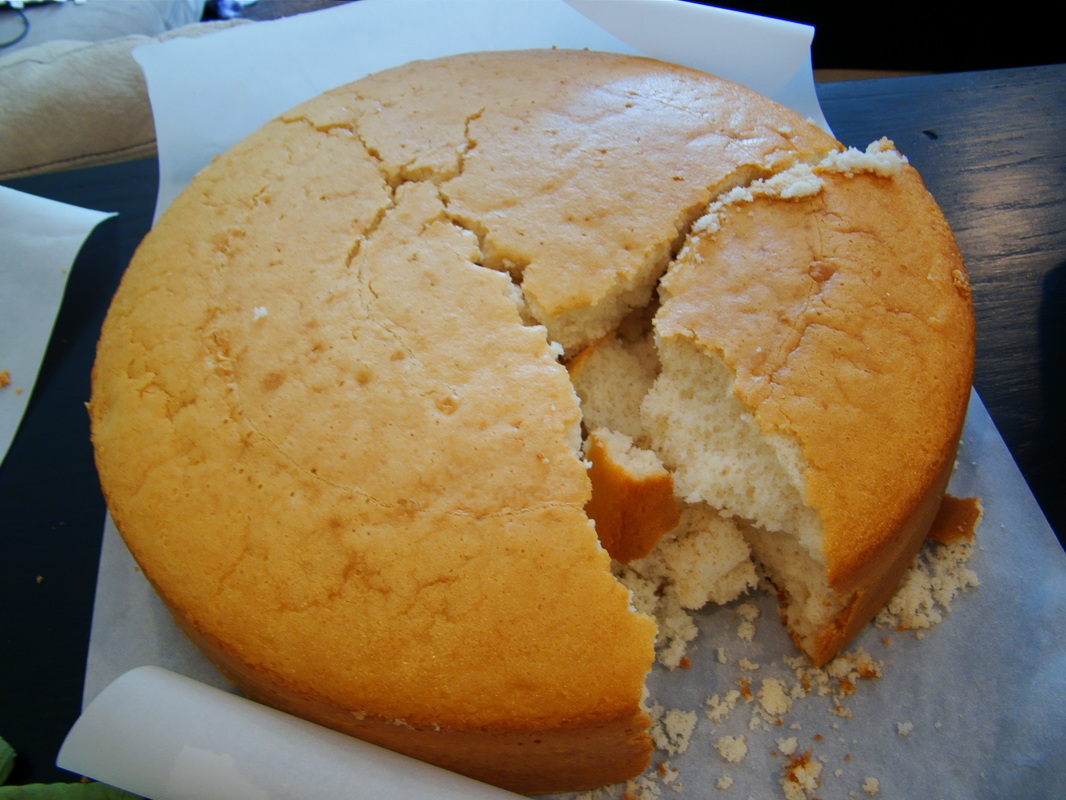 |
However, that did NOT go well. I started with the biggest layer first, and it fell apart :(
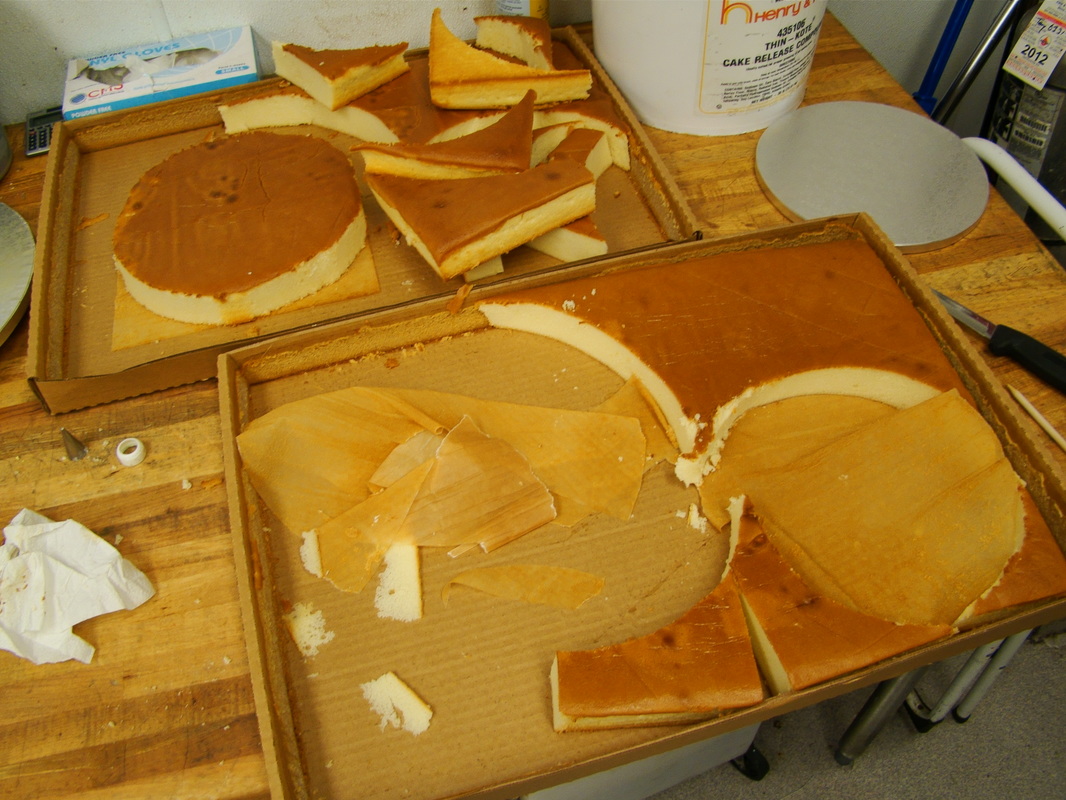 | 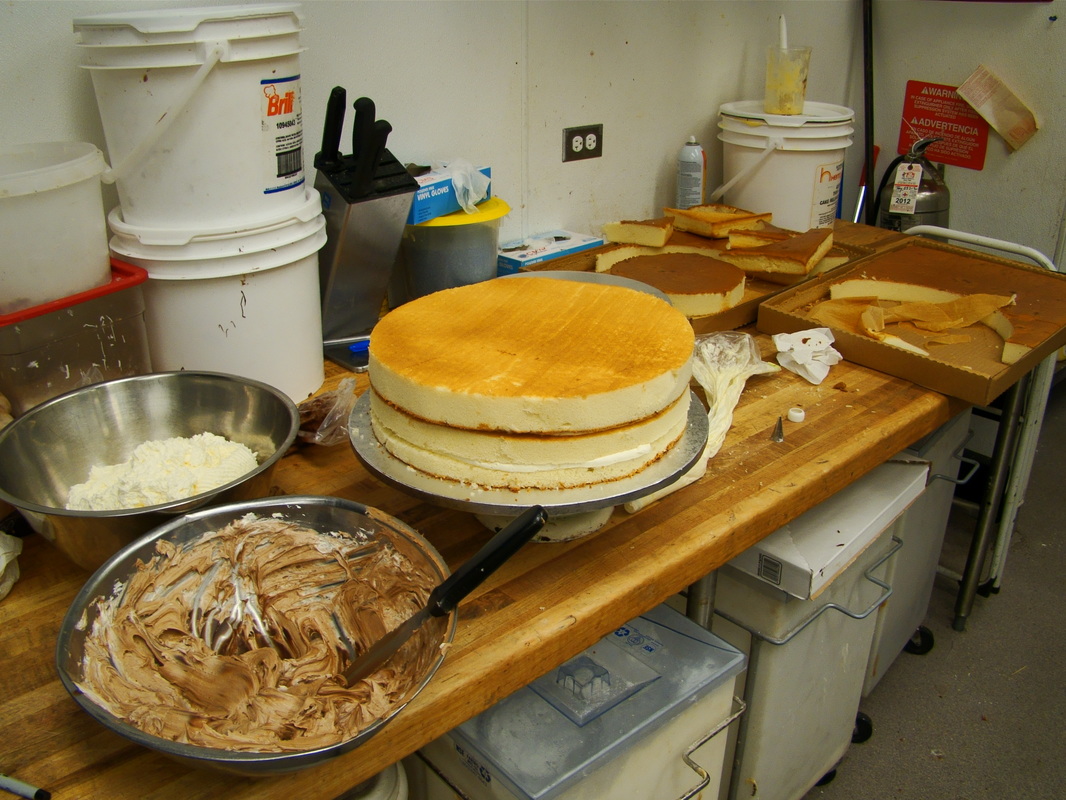 |
So I headed back to work where I was able to cut my layers out of sheet cake. It worked out so much better this way. I did back the top layer myself though because Rob wanted strawberry and we didn't have that flavor at work.
 |  |
 |  |
 | 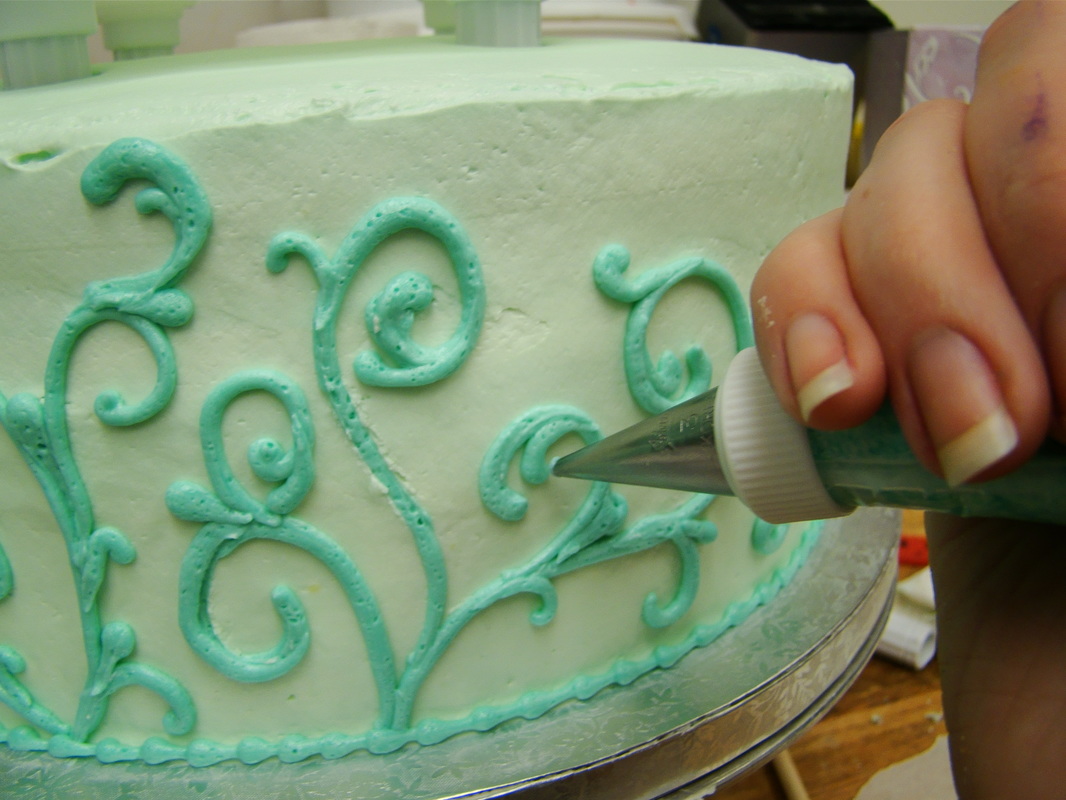 |
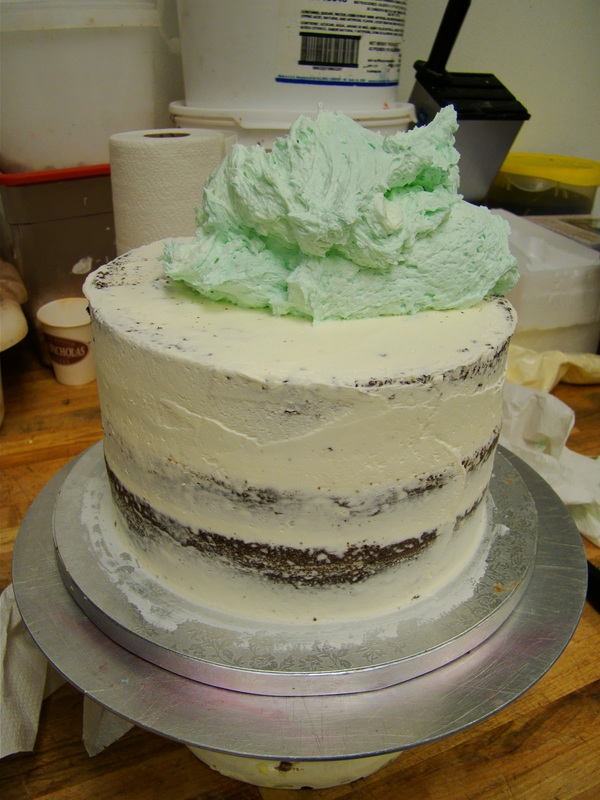
People are often surprised I took this one the day before the wedding, but this was one of my favorite parts. I got to hang out with my friend (who was working) and do something I love, it was very calming.
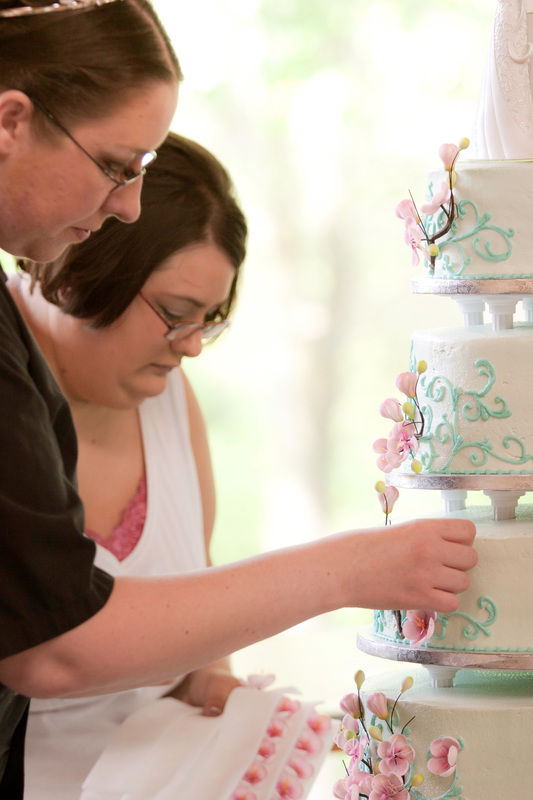 | 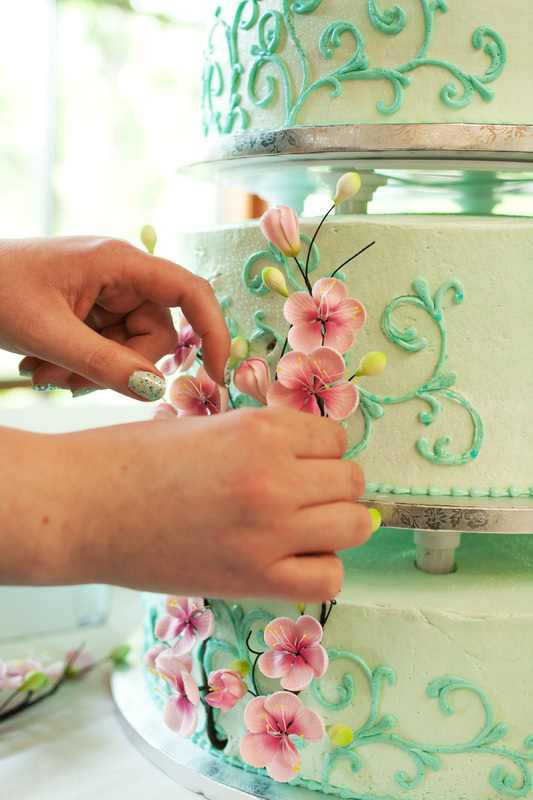 |
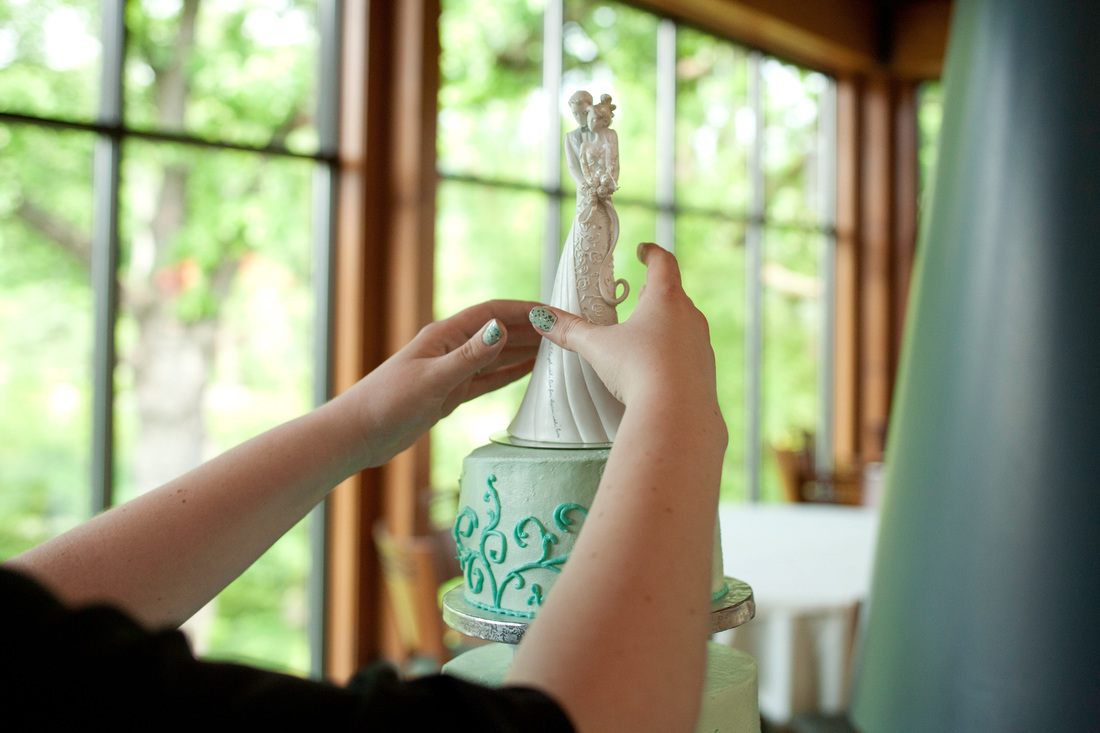
I put the cake layers together at the reception area, and added the cherry blossoms
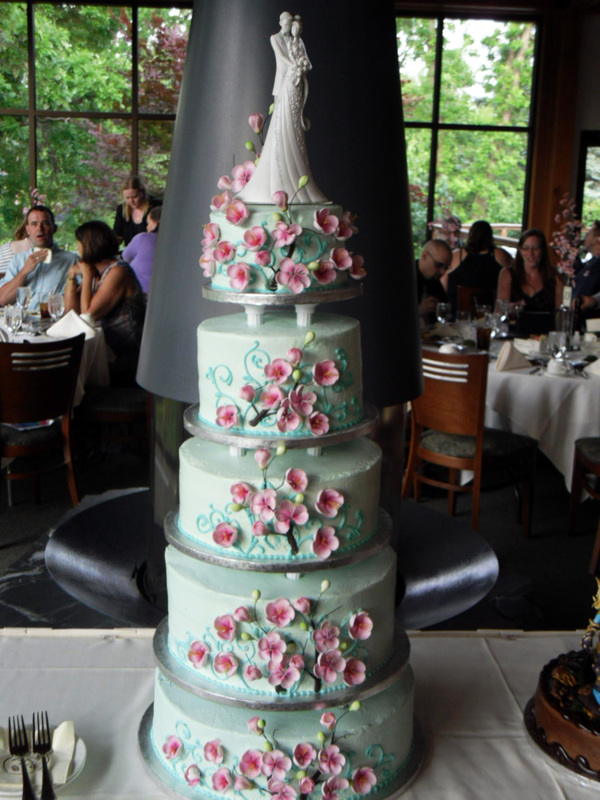
It was glorious......
 RSS Feed